Quantcast
Channel: Ladybug's Teacher Files
Viewing all 179 articles
Browse latest View live

Looking for a little inspiration for 2015?

$
0
0
I am SO excited to share this news with you!! Stephanie from Teaching in Room 6, Jen from Runde's Room, and I are joining together to bring you...
Inspiration Cubed is a new, monthly newsletter full of tips, printables, and inspiring ideas, all from our classrooms to yours! And you can start getting this triple-dose of inspiration delivered right to your email boxthe first issue comes out this Sunday! Sign up today:


Design with the Best Resolution (in PowerPoint)

$
0
0
Resolution Tips for PowerPoint Printables
Are you looking for some professional-quality, high-resolution images in your designs? It may be easier than you think, thanks to some great options available in PowerPoint!

To backtrack just a bit...  

PowerPoint (among it's other wonderful features!) has an option to save slides as pictures:
(does the mini-80s homage give away my age a bit??)

So after you have designed a presentation, each slide can be saved as an image:

This is ideal for creating previews images of your products or for embedding images into the background of slides, to create editable resources (would you like to learn more about that? Please leave a comment below if so!). There are so many possibilities with this feature!

The only problem? The image resolution. 

The default setting for "Save as Pictures" in PowerPoint is a lower-quality JPG...which means the images can come out a bit grainy. And all of those beautiful clipart images you have so carefully chosen for your printable can start to look a bit pixelated.

But there's a solution!

Your slide images can be saved as a PNG (a higher-quality format). AND you can choose the picture resolution! 

Which means you can go from this grainier-looking slide:

to this clean, crisp, and more professional-looking image:
(click on this image and toggle back to the previous one to see the difference)

And it's very easy to do!

When choosing "Save as Pictures", click on the Format drop down menu and select PNG:

 then click the Options button:

This will bring you to a menu of different choices:

For a higher image resolution, change the dpi (dots per inch) to a higher number. I usually go with 600:

You can also adjust the image quality in a drop down menu at the bottom of this box:

Once you have made the adjustments of your choice, click OK and PowerPoint will automatically set up a folder of pictures for each slide...and you are on your way to designing with high-quality images.

Please Note: If you are uploading preview slides to TpT, you will want to adjust these settings back to a lower-quality JPG (and 72 dpi)...otherwise your preview images will be too large to upload.

Have you used the "Save as Pictures" feature in PowerPoint yet?

Check your mailboxes for extra inspiration!

$
0
0
The second issue of Inspiration Cubed has been sent outhave you read yours yet? It's full of ideas, tips, and resources from the classrooms of Runde's Room, Teaching in Room 6, and Ladybug's Teacher Files…sent right to your email (and your classroom)!

Here's a sneak peek of my organizational tip for this month:
And that's the only place you will find it! 

All of the resources I share in Inspiration Cubed are ideas that won't be shared here on my blog, so be sure to sign up and get some extra inspiration!

Click here to sign up now: Inspiration Cubed

What To Do When They Are New

$
0
0
Tips to help your newcomer English Language Learners.
I feel so fortunate to teach newcomer English Language Learners. They work so hard and absolutely love coming to school each and every day! And there is nothing more rewarding than seeing them acquire English as they learn grade level content.

It can be challenging work though…especially when new students come midyear and are not speaking English yet. Luckily, there are many things you can do to help your newcomer English Language Learners. My dear friend Elizabeth and I would like to share what works for our newcomers…and to learn what works well in your class too!

Here are some of my tried-and-true tips for newcomer English Language Learners:

Use Hand Signals to Encourage Participation
My newcomer ELL students often feel hesitant to participate in class discussions, so I am always on the lookout for ways to get them to participate non-verbally as well. This year, I've been using more hand signals to get my newcomers comfortable in sharing their knowledge…and it has worked like a charm!
When we review a math paper, we show a one for the same response and a two for a "slightly different answer" (as we politely phrase it in my 5th grade class!). I've noticed that my newcomers are the first to remember and use these signals in our daily routine. It is wonderful to see them participate along with the rest of the class!


Label Everything with Visuals
The more labels you use, the more organized your students can keep the room, right? But labels can also serve another important purpose. They can help your newest ELLs gain basic vocabulary.


With pictures on these labels, newcomers are also able to access materials with ease, even if they are just beginning to speak English. Visual labels also allow them to help keep the room organized, along with their mainstream classmates:


Every single sign I use in my classroom has a visual to help my ELL newcomers (in a bright and fun colors, of course!). This resource features a large collection of labels my newcomers and I use all throughout our classroom this year:


You can also see my other visual labels here: Classroom Organization

Use a Document Camera for Clear Instruction
I cannot imagine teaching without my document camera. It's been said again and again, but a picture really is worth a thousand words, especially for students with limited English. 


We use our document camera for note-taking, science experiments, math activities…anything that requires a visual so my newcomers can follow along with ease. 

Of course document cameras can be costly...but there are some options if you don't have this kind of technology. One of my favorite alternatives that I have used over the years is the iPevo camera:

This little camera is less than $70! And the all of the visual instruction you can provide your newcomer ELL students…well that is simply priceless! You can read more about this document camera in this post: Cheap Document Camera

Scaffold Instruction
My newcomer English Language Learners experience the greatest success when my instruction is carefully scaffolded. Each time we learn new content, I activate prior knowledge, teach vocabulary before the lesson, model how to complete a task, provide practice in groups, and so on:

I gradually release until my ELLs are comfortable in working on a task independently:

In addition to breaking up my instruction in order to scaffold, I have also found it helpful to break up math concepts. For instance, before teaching powers of ten this year, I really needed to teach my newcomers about exponents. This led to my newest series:

This resource features two tiers of notebook pages with built-in scaffolding, all ready for you to just print and instruct. 

Make Meaning with Morphology
Once my newcomers have started speaking more English (especially that academic language!) I know it is time to break out my morphology resources. The study of affixes and roots helps all of my students acquire challenging vocabulary.

Our class uses Spelling with Morphology for both spelling and vocabulary instruction. It features an entire year of tiered lists, all related under similar categories:

These categorized lists really help my ELLs make connections between the affix/root and its morphological meaning, helping them acquire some advanced, grade-appropriate vocabulary.


I also love to decorate our classroom with morphological posters, to provide meaningful visuals. My latest resource features three sets of ELA posters my class constantly refers to throughout the school year:


What are your favorite strategies for working with English Language Learners? Elizabeth and I would love to hear your tips!
Fun in Room 4B and Beyond

a Rafflecopter giveaway

Make Instagram Videos with PowerPoint and QuickTime

$
0
0
Make Instagram Videos with PowerPoint and QuickTime

Hello Ladybug Friends! I've been spending a lot of time learning about making videos on Instagram lately. And this is thanks to my sweet sister, Melissa, over at Fashion Craze Learning Days. My sister showed me how to use a PowerPoint slideshow as a video and then upload it to Instagram. Then, in that maddening thing that younger sisters do, absolutely refused to listen to me when I told her to blog about it! Why don't they listen?! Here's her blog if you'd like to stop by and say hello, since this is really her idea…plus she's having a great giveaway right now:
Anyhow, Melissa  told me to go ahead and blog about it. So I learned some new tricks along the way after making MANY mistakes…and I would love to share what we have learned with all of you!

You will need PowerPoint and QuickTime in order to follow this tutorial. And an Instagram account, of course!

First, create a short slideshow of what you would like to show in your video. I used the cover of my newest product as the first slide:

Then I edited a few slides to show the features of the product:


On the last slide, I used the cover again:

Next, open QuickTime to record a video of your PowerPoint slideshow. Leave your PowerPoint file open as is and go to QuickTime. Choose File, then New Screen Recording:

You will see a recording box pop up:

Slide this box down to the bottom of the page, where it won't be in your way but you can still click "record":

Click the record button and you will see a message pop up asking you to click to record the full screen, or to select part of the screen to record. Choose the full screen option, since you will be recording your slideshow:

After clicking this message, quickly click on your PowerPoint and go down to the Slideshow icon (this will launch your slideshow right away):

Now QuickTime will record as your slideshow plays:

Once your slideshow is finished, click stop on the recorder. Then go to Edit and Trim…this will help you cut out the parts of the recording you don't wish to see:

Since QuickTime records everything from that first click, it will have recorded your PowerPoint file before the slideshow even began…so you will want to get rid of those extra parts. Plus, Instagram only allows up to 15 seconds of video. Go to the trimmer at the bottom of the screen and move the slider to capture the parts of the video you would like seen:

You can trim from the beginning and the end of your slideshow. I made sure it began and ended with my cover, so it looked complete:

Once you have trimmed the video, go to File and Export:

Name your video and choose the Format for iPad, iPhone, and Apple TV:

Now you must get the video to your phone or iPad to upload to Instagram. You can email the video to yourself and save it from there, or use DropBox.

You may also need a free app: Insta No Crop Video. This app automatically sized my video so it would fit on the screen…otherwise it was getting cut off.

Open the video in Insta No Crop:

You can choose a border color (of course I chose black!). Then save your video. It does say "post to Instagram" but then prompted me to save it first…so I saved it to my camera roll:

Head into Instagram and click on the video camera:

Select the video you just edited:

Click Next (you've already trimmed and cropped with the app):

Keep on clicking Next until you get to your Share screen. Now you are all set to share your new video with the world!

You can see my finished video here: Ladybug's Teacher Files Instagram

I hope this was of help to you! Once again, a HUGE thanks to my little sister for helping me get started on these videos. Click on over to her blog to say hello and enter her giveaway:
I have another PowerPoint tutorial to share with you as well. It's a new one over at Blog Hoppin' (it's my very first post there and I'm so excited to be blogging with those incredible women!). Click on the image below to hop over:

Making it Stick (Adhesives that Last in Class)

$
0
0
Have you spent countless minutes carefully hanging your classroom signs, only to find them slowly slipping from your walls?

They're tricky, aren't they? 

Sometimes they seem like they are perfectly attached and then, three months later, you walk into your room to find this:
 
It's so frustrating, isn't it? And we just don't have the time to keep re-hanging the signs and labels our students (and we) rely on! 

So I'd like to share a couple of adhesives that have worked very well in my classroom over the years. And, believe me, it's a great test site for adhesives. We have no air conditioning and VERY humid weather each fall and spring. And these two adhesives last!

My first and most favorite is hot glue. If I could write a love poem to an adhesive, it would be an ode to hot glue.

Hot glue works very well on any classroom surface that is smooth and shiny, especially those plastic containers so many of us use. If your label is laminated, the hot glue will hold it flat against the container and last through years of classroom wear and tear:
     
    You know what the best part is?

    When you want to remove the labels, they come off cleanly! Well, sort of. It requires a bit of tugging, but the label usually stays in good shape. The container may have some glue left behind:

    But this glue can be peeled off and the container will be unharmed. The same is true for the back of the label:
    Another adhesive (a newer love of mine!) that works so well during the changing temperatures and humidity is sticky tack (also known as Blu-Tack or Fun-Tak). You know, that blue sticky stuff your students might think is gum.  ;)
    I've been using sticky tack for my anchor charts this year and it has worked so well. None of my anchor charts have fallen, despite temperature changes in our classroom. And this is the best adhesive for moving things easily, so it is ideal for moving those anchor charts to make room for new ones.

    Well, only on a teacher blog could you go on and on about classroom adhesives. Which is really why I love blogging! I hope this was of help to some of you...and I hope it saves you time in picking up signs and labels that have fallen on the floor! 

    Do you have any favorite adhesives you use in your classroom?

    ❤ You Are Appreciated ❤

    $
    0
    0
    This is one of my favorite weeks in the entire school year...because it's all about saying thanks to the educators who make a difference each and every day. And there's nothing I love more than celebrating the incredible teachers I am privileged to speak to and learn from every day online...

    All of you!

    So, as a token of thanks and appreciation, several of my intermediate friends and I are joining together to send a teacher care package to one of you! Each package is unique and all were lovingly made with all kinds of teacher goodies, classroom resources, and a $25 gift certificate to Teachers Pay Teachers.

    I am bringing a bit of my classroom to yours in my care package:

    What can you win?
    A Black with Brights Cursive Alphabet Line, all ready cut and laminated for you:

    A beautiful chalkboard sign with a liquid chalk marker (I LOVE these markers!):

    A chalkboard bucket (you can really write on it!) filled with highlighters, a pair of scrap booking scissors, and a star hole punch (perfect for marking student work, like those interactive notebook pages you've checked):

    A vase of flowers to brighten up your desk (with a coordinating sign):

    A container to organize your mentor texts (already labeled for you):

    A set of bright chevron cards and envelopes (to match the Consistent Colors Decor Line):

    A digital copy of Classroom Organization (over 550 pages, with many editable options):
    https://www.teacherspayteachers.com/Product/Classroom-Organization-1606855

    As well as digital copies of these morphology resources:
    https://www.teacherspayteachers.com/Product/Spelling-with-Morphology-An-Entire-Year-of-Differentiated-Spelling-Lists-1233025
     https://www.teacherspayteachers.com/Product/ELA-Posters-Notebook-Templates-Academic-Morphology-Bundle-1627245
    And, last but not least, a gift certificate to Teachers Pay Teachers (just in time for the sitewide Teachers Appreciation sale!):

    Would you like to enter? Check out the two easy options for entry below:
    (Please Note: Due to shipping, this package is only available for citizens in the US and Canada)

    And here's the best part...there are more care packages being given away right now! Please stop by my friends' blogs to check out all of their care packages here: 

    Getting labels ready BEFORE the next school year...

    $
    0
    0
    As many of you know, I have worked with the black, white, and brights scheme for several years now (since 2012!). Even after all this time, I still love how the colors pop and they have remained trendy enough to appeal to my 5th grade classes over the years.

    I do like to evolve my room scheme a bit each year and add a few new elements into the mix...different posters and labels to change things up slightly. But I always try to do this in a small-scale way, so I'm not spending the entire summer redecorating my classroom.

    Which is why I love getting my organizational labels ready BEFORE the next school year. It's actually a very easy process, as I find myself madly spring cleaning around this time each school year!

    I start with the toolboxes. I have two for myself and six others for student supplies at their tables. 

    I usually don't need to change much with my toolboxes...unless I find I didn't use a particular drawer that year and want to add in a new supply.
    https://www.teacherspayteachers.com/Product/Editable-LabelsTeacher-Toolbox-Consistent-Colors-1733628
     click the photo to see these Editable Teacher Toolbox Labels

    The student toolboxes I do keep pretty consistent because they have worked so well for us over the years. The only thing I will be changing out next year is the dry erase marker drawers...I have a different idea for that storage I'd like to use instead. So I will be adding a different supply, to have more options right at my students' fingertips:

    click the photo to see these Student Toolbox Labels

    Library labels...well I've had SO many over the years that I have loved. I usually change them out at the end of the school year as I weed through and re-sort my library. 

    I will not be changing my labels from this year however, as I absolutely love them and they were so easy for my students to read from far away. They kept everything in order and really helped the traffic-flow in our library.

    So I will just be adding a couple of new genres from my library resource based on my numerous book purchases this year (Dystopian for one!):
    https://www.teacherspayteachers.com/Product/Editable-LabelsClassroom-Library-Simply-Iconic-1367784

    These old labels are in still in great shape. I have found if I print them on cardstock, laminate them, and hot glue them to the bins, they can last for years. And that helps a major part of my classroom to be sorted and ready to go for next year BEFORE next year...always a relief!
    https://www.teacherspayteachers.com/Product/Editable-LabelsClassroom-Library-Simply-Iconic-1367784
     click the photo to see these Editable Library Labels

    I might have a lot of library labels in store, but I also have a ton of alphabet lines. I keep my various sets for a couple of years, again printing them on cardstock and laminating them for longevity. We are not allowed to keep things on our walls over the summer, so I always pack them up in order, so they are ready to display as soon as I can get back in my classroom:
    https://www.teacherspayteachers.com/Product/Black-With-Brights-ZB-Cursive-Alphabet-Line-Consistent-Colors-782605

    https://www.teacherspayteachers.com/Product/Black-With-Brights-ZB-Cursive-Alphabet-Line-Consistent-Colors-782605
     click the photos to see this Alphabet Line

    It may not seem like a lot, but by organizing and prepping these labels and posters in May and June, I save myself so much time over the summer...some major parts of my room are already decorated, organized, and ready to go!

    If you'd like to get a jump start on your decorating and organizing, now would be the perfect time to stop by my store! All of my decor items are on sale right now. If you are looking for an easy-to-use and customizable resource, my Classroom Organization Bundle features toolbox labels, schedule signs, and library labels (with many editable options to make the exact signs you need for your classroom):
    https://www.teacherspayteachers.com/Product/Classroom-Organization-1606855
    Don't forget to use the promo code ThankYou when checking out for maximum saving! Thanks so much for stopping by...Happy Teachers Appreciation Week!!!


    Carson-Dellosa Blogger Summit 2015 (Giveaway)

    $
    0
    0
    http://ow.ly/OQKrJ
    This winter I had the great fortune of being asked to join several incredible blogging friends for the Carson-Dellosa Blogger Summit for 2015. What is this summit all about? Why, the dream of so many teachers...classroom decorating!!

    We were asked to use one of many adorable sets from Carson-Dellosa's decor line:
    http://ow.ly/OQKrJ
     ...and set up a mini-classroom showcasing the line!

    My theme was Parade of Elephants. And I have to tell you something  about elephants. I absolutely ADORE them! I have all these elephant figurines I collect from different places...they are such a wise and incredible animal. But enough about my love of elephants. Let's talk Carson-Dellosa's elephants.

    As an upper-elementary teacher, I was delighted to find these elephants are perfect for a range of elementary students (not too young-looking, just fun!). Each elephant has these beautifully-patterned ears that reminded me of a Moroccan-look, which is so trendy these days.

    I decided to use a beautiful gray at the main color in the "classroom", to really let those elephants pop:
    http://ow.ly/OQKrJ

    One of the best things about the Parade of Elephants set is the variety of elephant cutouts. There are so many things you can do with these cutouts, from decorating bulletin boards (such as this Exit Slip board):

    To decorating your teacher desk:
    http://ow.ly/OQKrJ

    To dressing up all of your plastic storage!
    http://ow.ly/OQKrJ

    The elephant cutouts were also the perfect little tool to display anchor charts! I glued a clothespin to the back of each elephant, then clipped the anchor chart for an easy way to switch the charts out.

    There are so many bright color options with this set, so I did a little bit of color-coding as well. All the orange charts and elephant cutouts for reading information and green charts and elephant cutouts for math (this is also something I like to do in my own classroom...you have noticed I'm crazy about color-coding, right??):
    http://ow.ly/OQKrJ

    Finally, I used these beautiful pennants that accompanied the elephant set to create a reading genre tree for the classroom library. Each pennant features a genre's name and definition:
    http://ow.ly/OQKrJ

    I only wish I had more time to spend with these elephants because this set has so many options...the possibilities for decorating are endless!

    But here's the exciting part:

    YOU may have tons of time to work with this set because one lucky reader will be winning the Parade of Elephants Classroom Set (a retail value of $100)! Please see the Rafflecopter below for more details.

    Thanks so much for stopping by!

    Open to US residents only.

    a Rafflecopter giveaway

    Get Everything in Order...Before They Even Arrive

    $
    0
    0
    I am beyond excited to write this today! I am joining an inspiring group of upper-elementary friends to share a Back to School Survival Guide. And it is chock-full of tips and resources to help you prepare for a brand new year!

    I'm hoping to provide some helpful hints you can use, well before your students arrive. I'm also hoping you will be able to share your tips at the end of this post as well, so we can compile a huge list of ideas together!

    One of the most important ways I get ready for each new school year is to have everything in order before my students arrive. I realize that sounds fairly obvious...but the fact of the matter is, I don't always have a finalized class list until that first day of school.


    And more times than not, a new student or two shows up unexpectedly. How can I set up a well-organized classroom with all this unknown?
    Not always having a class list can put things on hold. And I hate to be flapping around the room grabbing materials for the new students who arrive two days into the school year. I want to be as ready for them as I possibly can so I can welcome them warmly. So I prep everything I possibly can in advance...here are my tried-and-true tips for doing so...

    Student Name Plates
    I am just a little Type-A with how things should look. Have you noticed this? ;) But I've learned to let a few things go for the sake of preparation. For my student name plates, I would really love to have them printed out with a great font. To be ready for a new school year as soon as possible, I print and laminate them ahead of time, during the summer break. Then, once I have my class list, I write the students' names with Sharpies. In order to keep the names from getting erased over time, I use a piece of clear packing tape over the name.
    (click here to download this name plate)

    Student Materials

    Since my students sit together at tables, I like to have materials ready to go for each group, right from day one. One of the best tools for this has been my Student Toolboxes. These toolboxes house all of our community supplies in an organized fashion and are perfect in case students are unable to bring some of these supplies to school.

    The toolboxes are also great places to store a folder on back. These are called backpack folders and are top-loading. I attach them with Velcro and they are the PERFECT place to hold papers for the morning, or even different parts of the day. Nothing makes me feel more prepared than having all of my student papers for the morning already passed out into these folders, ready to go. I use this method from day one so I can hit the ground running, even if I have extra students arriving:

    (click here to download these table signs)

    Numbering the Classroom
    This is one of the most important ways I get my ENTIRE classroom in order, well in advance. Numbering students and tables is something I have done for many years now...and I find that I incorporate it more and more into all areas of my room over time because it is so helpful in managing all materials.

    Numbers for Group Materials
    As you read above, my students sit at tables and are numbered accordingly. We have seven tables and I use numbers to keep all group supplies organized. I number any supply caddies (we use these for art materials):

    as well as textbooks for each group. I store them in bins like these (they are the new black ones from Really Good Stuff...squee!). This makes it easy for a student to grab three at a time for the classmates at their table:

    I also use group numbers for other supplies, such as science experiments. This summer, I have been compiling many of the basic materials we use in all experiments in those large Ziploc bags (this one is a work in progress). I use labels with corresponding clipart to make things clear, as half my class is comprised of newcomer English Language Learners...plus it's helpful for mainstream students as well:

    Numbers for Reading Materials
    Using student numbers also helps me get things in order for all of my reading materials, ahead of a new school year. Just as in the science supplies, I like to set up reading bags. I use coordinating stickers for these because they are fast...just slap a  sticker on  (ok, place it carefully so it looks perfect!) and cover with a bit of packing tape for longevity:

    I like to use the same stickers to number my sets of class novels, for our read alouds:

    Numbers for Individual Materials
    If you've read my blog in the past, you'll know I am a huge fan of those Sterilite drawers. We use the extra-wide ones meant for scrapbook materials. Each of my students has two drawers to store their supplies:

    One drawer is for math, science, and social studies materials. The second drawer is for reading and writing. I have used a variety of designs for labels over the years, but ALWAYS the same size and layout because it works. The numbers are easy to read from across the room and help my students keep things exactly where they should be.

    Everything stored in these drawers has the student's number as well. Math notebooks have a number sticker:

     All reading and writing materials are stickered as well:

    I fill all of my student drawers with these materials, ready to go, well in advance of a new school year. This is one major thing that is already done, even before I have a class list. I also stock enough drawers to be planned ahead for any new arrivals...since I have students enter throughout the school year (as I know many of you do as well!).


    Numbers for Student Checklists
    I am a big fan of checklists. I like to keep track of everything, from taking turns on alternative seating, to which students have passed in a permission slip, to homework checks, and so on. 
    I get these checklists ready ahead of time, with the numbers already in place. As soon as I get my class list, I enter the names of my students and I am ready for a year of organization!

    I hope these tips will help you with your preparations for a new year, so everything can be put into the right place, as soon as  your students arrive....

    If you'd like to try these methods to get your entire classroom numbered and organized, I have all of the number labels above (and a lot more) available in this resource. It has over 1,900 pages of labels in different shapes, sizes, colors, as well as editable checklists. And the best part? Student Number Labels has a  TON of techy shortcuts to help you navigate right to the exact labels you need to print. Please click the image below to learn more:
    https://www.teacherspayteachers.com/Product/Number-Labels-1981129
     
    And there's more...a TON more! Please be sure to stop by these incredible blogs to read their Back to School Survival Tips...just navigate the icons to get you on your way. You can also enter their giveaways for more chances to win those TpT gift cards:

    Saving Time on Classroom Setup

    $
    0
    0
    Over the years, I have always flown into school as early as I possibly could, the moment those floors were waxed (sometimes even having to test the floor's stickiness with a toe...shhh!!!). And so would begin days and days of classroom setup.

    I would work feverishly, obsess over all the little design details, and keep coming back to do more. I just LOVE setting up my classroom each year. But I found I was doing more and more each summer because I had given myself the time to do so...I was starting way too early. Then, last summer, my sister and I had quite the challenge. We had to move everything out of her old classroom at a different school, set up a classroom in her new school, then set up my entire classroom (to my picky, type-A specifications). It was a LOT of work for us last summer...and I really regretted not taking the time to prep things more in advance so I didn't have to spend quite so many days in school.

    This summer, I have not set up anything in my classroom yet (!) and we start in early September. Instead, I have been prepping as much at home as I possibly can ahead of time, in efforts to streamline the setup process before I even get to school. My goal has been to have everything ready to go, packed up in an organized fashion, and above all:

    Remove the need for unnecessary thinking.

    So I realize that might sound a little weird. I mean it's not like I want to get to class and totally zone out. I DO want to be thinking. I want to be thinking about the important things as I set up my room...going over the beginning routines in my head, mentally checking off everything I need for the first day. Not thinking about where I stashed a missing label or unpacking endless boxes of crayons.

    So I wanted to share what I have been working on this summer to streamline the setup process. I realize many of you are already back at school (and probably much faster at setting up your classrooms!). But I hope this will be of some help to those not starting back quite yet, or unable to get in until that very first teacher workshop day (as I know many of you have shared with me in the past).

    Many of these strategies are things I have done for years, while a couple are new attempts at saving valuable time.

    Strategy One: Laminate Only What Must Be Laminated

    Oh, laminating. While I absolutely loathe cutting all of the plastic pieces until my fingers go numb, I do love how bright and shiny it makes everything look. But the truth? There is very little in my 5th grade class that truly needs to be laminated.

    I have kept laminating at a bare minimum by asking myself one question: 

    Is this item handled often?

    So yes to student supply drawers, toolboxes for community supplies, nameplates, and library bins. These things are handled by students often and I don't want to be replacing labels all year:
    (Teacher Toolbox Labels)
    But for the first time in my career, I WON'T be laminating our cursive alphabet line, posters, anchor chart titles, station cards, and anything else that adorns our classroom walls and is hardly ever touched by students.

    How does this help? Well, I am already done laminating for the summer and it only took one session:
    (Student Number Labels)
    With less laminating also comes less cutting. Which saves my hand from a bit (who am I kidding, a LOT) of pain and frees me up to tackle other projects. This brings me to my next strategy...

    Strategy Two: Use Scissors as Little as Possible

    This sounds a bit crazy I suppose. I mean, cutting is a necessity for setting up the elementary classroom, right?

    But there are shortcuts. Say hello to three of my best cutting friends:

    These cutting tools are an absolute godsend and time-saver (um, hand-saver?). 

    The circle cutter really is my favorite and I've blogged about it several times over the years:
    It can be tricky to get used to initially. The key is to line up the guide by the exact measurement first. So this circle is 3.5", and I have the 3.5" guide lined right up over it. Then, I make the cut just one measurement down, so it is guaranteed to cut within the shape and not outside of the circle accidentally:

    Not only does it cut perfect circles, it saves your hand from cutting them out with scissors. And it only takes a moment once you are used to it:

    Equally helpful is my paper cutter:  
    Any straight lines are cut with this tool. It's quick and easy to line up cut, with very little pain...even when you have to tackle a huge pile of decor.

    This last one isn't really a cutting necessity, but it is a great little tool if you want to finesse your decor and give any squares and rectangles a bit of rounded shape:

    This little corner-rounding tool is also a painless option. Simply put the corner in the guide and punch:

    It'll give you nicely rounded corners, again saving cutting time and any unnecessary pain.

    Strategy Three: Use Numbers to Label Everything 
    If you are a teacher who numbers students, then this truly is an ideal way to prepare many materials, well before you get in to your classroom. All labels can be printed, cut, laminated (only if needed!), and ready to go ahead of time! This is useful if you are unable to get into school until the starting day, or if you do not have a class list yet.
    I also like to use numbered stickers to set up bags for our reading and science materials:

    (Student Number Labels)
    I blogged a great deal about how I use numbers to organize my entire classroom recently, you can read more about it here:

    Strategy Four: Organize All Signs and Labels
    Of course I always pack my labels together by kind before I head in. But I have learned it is also helpful to organize them as much as I can before I bring them to class. So those numbered labels? All stacked in order, EXACTLY the way I want them to appear on my students' number drawers, so I can just glue them down right in order:

    I even pack up our daily schedule in order, so I do not have to think about what to place where...I can just hang it right up, from top to bottom.

    Strategy Five: Pre-Organize Student Supplies

    When I was a young teacher, I used to bring in boxes and boxes of markers and crayons and sit and blissfully unpack them, marveling at their colorful beauty and lovely new-school-supply-smells.
    Those days are over.

    Kind of. I still love the smell of our new crayons!

    All joking aside, I have found it extremely helpful to unpack everything, recycle those cardboard boxes:

     And sort all supplies as they will be arranged in class:


    Since we use Student Toolboxes, I group the supplies by drawers and elasticize them ahead of time. Then I bag them up by each table's toolbox:

    And box them up:


    This saves me a ton of setup time when I get to class and frees my mind to be thinking of more important things, as I fill each toolbox quickly.

    Strategy Six: Pre-Tape and Pre-Velcro
    I am big, big fan of hot gluing signs and labels. Especially those laminate ones I want to last all year (or for years!). But I don't always have time to hot glue everything during that first day of setup. And taping things to the wall really does take forever, doesn't it? Please tell me I'm not alone in thinking this!

    So I am using these adhesives to pre-adhere as much as I can:

    The Velcro I am using for the name tags on our chair pockets:
    (Editable Name Tags)

    I am cutting the Velcro squares apart, but leaving the plastic on one side. That way, I can stick the Velcro to the name tag, peel the plastic when I get to class, and attach to the chair pocket:

    The removable mounting tape is a new one for me...I will have to let you know how it goes. I am using this on our cursive alphabet line and daily schedule. This will allow me to quickly stick these items up on the walls that first day of setup, yet move things around and make adjustments if needed.

    Just like the Velcro, I am cutting around these adhesive squares so I can leave a bit of plastic to be peeled when I get to my classroom:

    Please believe me, I am certainly not an expert when it comes to this kind of setup. Remember, I'm the one who usually takes forever in the summer to get my room to the absolute ideal I envision! 

    So my two questions I leave you with are:
      1. Do you have setup tips to share with us? Ways to cut corners and save time in classroom decorating? 

      2. Would you like to read more about this? I can feel a "part two" coming on as I continue to get things ready at home this week.
        Thanks so much for stopping by! I truly hope this was of help to some of you!

        Organizing with Color: Extra Supplies

        $
        0
        0
         
        Hello dear friends! These beginning weeks have just flown by and today I realized I haven't stopped to share any classroom pictures! I hope to post a classroom tour very soon but, in the meantime, I wanted to share a quick idea that has been working very well for our class.

        You know that beautiful moment that happens so often in our classrooms? The one where all of your students are happily immersed in a project and you can just feel all the creative energy flowing? It's the best, isn't it? But sometimes that creativity can be interrupted by searching for supplies...

        "Do you have an extra red marker?" 

        "Does anyone have a black Sharpie?"

         "I need a light green crayon!"

        So this summer I decided to add another organizational system to my classroom, one that would save precious time AND be easy for my students to manage...I organized all extra supplies by color:

        I bought several mason jars and an array of popular supplies, from crayons to Sharpies:

        And sorted everything by color:

        These are community supplies. My students know they can use them if they need a certain color, as long as they return them once they are finished. The mason jars (besides being really lovely!) make it easy to see the supplies. And the color-coding keeps everything in order and easy to locate quickly.

        Pretty simple. And you know what else? The jars make beautiful, yet functional, decor pieces that really stand out when you enter the classroom!

        I've been using organizational color-coding in other areas of our classroom as well and will be back to show you more soon! 

        Do you use color-coding in your classroom? Do you have ideas for extra supplies to share with us? Thanks so much for stopping by!

        Halloween Table Settings for Busy Teachers

        $
        0
        0
        It seems like we are busier and busier each year, doesn't it? More tests to score, data to track, work to differentiate...the list just never ends.

        And that busy schedule can make it hard for me to plan special events for my class. Yet I want to make those holidays memorable for my students, like the holidays I remember from when I was in elementary school.

        Do you feel the same way? 

        If so, I'd like to share a few time-saving printables that will dress up a festive and fun Halloween table in no time!

        We don't have very many parties in 5th grade. Our annual Harvest Party takes place tomorrow and then we have a Winter Holiday celebration right before the Christmas break. So I always like to make the events as festive and academically fun as I can.

        This year, I found some great plates and napkins from Target. I went with orange solids and black and white patterns (I knew this would be appealing to my older students):

        I also got some of those trendy paper straws for the water and juice (I couldn't resist!):

        Many of my wonderful families are sending in waters, crackers and cheese, sweets, and healthy snacks as well. To showcase these items, I made some decorative table signs.

        For the water graciously donated, I made a sign for "invisibility potion" (get it?? Ha ha!):
        (I know my 5th graders will appreciate the humor)

        I peeled the labels off the water bottles to make them look, well, more invisible:

        This took just a few moments to do and it looks great with the sign and straws! In the past I have made cute little bottle labels but, truth be told, it takes way too long to affix enough of them for an entire class. And they are only used for a moment before being tossed into the trash, where I gaze sadly at my creations that took so much time to set up.

        This was more practical and much faster.

        I also made a couple of signs to showcase the snacks my students will be bringing in. I kept them on the smaller side, so there is space for the food (the part that really matters to a 5th grader!):


        To add a bit more festivity to the table, I washed out and filled up some of the mason jars we use for extra supplies:

        I also filled up a jar with my student gift...they will each get a couple of glow sticks to use as a safe treat on Halloween night:

        You may recognize that little sign, it's a spin on an old file from a few years back. You can see the older version here: A Bit of Light...

        I decided to use one sign near the jar to save time in taping the glow sticks to individual signs. However, I am sharing a entire page of them at the end of this post, in case you'd like to print enough for each student in your class...

        So the whole setup only took about 10 minutes after school this evening. Well, to be completely honest, it took a teeny bit longer since I had to take photographs. But if you would like to try yourself, this setup is very fast!!

        All files are in a rectangular shape that can be cut quickly with a paper cutter. I printed mine on cardstock and will slip them into a file to store and reuse again next year. 

        If you would like to use any of the signs featured in this post, please click on the image below:
        http://bit.ly/1Mlp5Kn
        (I cannot wait to see it tomorrow with all of the snacks as well!)

        I hope this was of help if you are looking to set up a quick, but fun and festive Halloween table!

        What are some of your favorite tips to set up a holiday party quickly?

        Keeping Track of Everything with Checklists

        $
        0
        0
        As teachers, we often joke about the "things they didn't teach us in college". From classroom management systems to organizational techniques, teaching can get pretty overwhelming.

        There is just so much more to do than "teaching" the class. We must keep track of EVERYTHING going on in our classrooms.

        And I've always found this to be one of my greatest challenges. Keeping track of everything—keeping my finger on the pulse of my classroom. 

        As I've learned over the years, you can have containers and bins and labels and keep it all organized...but it's still hard to know exactly what is going on in all areas of your teaching, isn't it? 

        There are reading groups to run, assessments to be scored, line leaders to be chosen, permission slips to be collected, homework to be checked...the list goes on and on. And I've always wondered: how can I keep track of it all?

        Now, in my 14th year of teaching, I finally figured it out.

        Keep checklists to track EVERYTHING. 

        A checklist. It seems SO simple, but it really works. Because the more I keep track of, the more I know exactly what is going on in my classroom. If I keep a list for everything, then everything is truly accounted for in my teaching. It's such a small thing to do, but has had a huge impact on running my classroom effectively.

        Whose turn it is to share at morning meeting? ✔
        Which students have not returned their progress reports? ✔
        Which writing pieces have already been revised? ✔
        Who comes to reading group with their materials prepared each day? ✔
        Who hasn’t been Citizen of the Month yet? ✔

        I have been using so many checklists this year, I put them together into a book:

        I also made tabs to keep my lists organized by subject. I used a spiral binding machine, but the lists can be stored in a regular binder as well.


        This book never leaves my side because I use so many checklists every day. And I wanted to share just a few ways I have been using checklists to keep track of everything in my classroom. 

        Keeping Track of Grading
        Even though these are checklists, I use many of the sheets to record number grades on assignments, tests, student notes, and projects. I also use the checklists to record scores on district assessments.

        I note our fact fluency scores each month (a district assessment):

        As well as our running record scores each trimester:
        (I set up each column just as it is to be typed online, which has made data entry so much easier this year.)
        Keeping Track of Small Group Instruction
        Like many classes, we work in guided groups during reading and math (the math part is new for me this year!). Keeping checklists has enabled me to track all aspects of my small group instruction.

        I check which students come to group prepared each day:

        I keep records of group and rotation numbers:

        I also keep specific lists to track progress, such as comprehension and fluency in reading:


        This helps me track my students' progress and assists in planning future lessons.

        Keeping Track of Student Participation
        Thanks to the checklists, I have found myself even more aware of student participation than in previous years. I find myself trying new techniques to get my students actively engaged and have seen a big improvement in this area. I know it's thanks to keeping track of this important part of learning:

        Keeping Track of the Writing Process
        I use many of the same checklists for writing as in the other subjects, along with some other special sheets to track various parts of the writing process:


        Keeping these lists has helped me know exactly where each student is, as well as what still needs to be done.

        Keeping Track of Parent Communication
        Using checklists has also helped me keep better track of communication with families. I use checklists for emails and phone calls:

        I've also used a list to help organize my parent conferences this year:

        Keeping Track of Classroom Management
        Some of the easiest checklists to keep are those for management systems. A simple check or a day of the week helps me keep things running smoothly. I use lists to note students' turns for technology, the days they can share at morning meeting, and so much more.

        I check off which students can sit on the couch:

        As well as who the teaching assistant for the day:


        Keeping Track of My Organization
        This is probably my favorite thing to trackmy own organization! All those little things we have to collect each week? I track them ALL now!

        I have lists for the permissions slips returned and field trip money my students have brought in:


        I keep a weekly record of the Wednesday folders that have been returned:
        (it's amazing how much this one has helped...I always have all my folders now!)

        I can also organize all those small items we encounter each day, such as exit slips:


        I really could go on and on about these checklists, but it would become a never-ending blog post!

        I hope you will be able to use some of these ideas to keep track of things in your class. If you'd like to get this management resource for your classroom, it is available in my TpT store. There are 100 checklists all ready to go, as well as 20 editable checklists (so you can make the exact lists you need).

        Oh, wait! I'm forgetting the best part!

        You only have to type your students' names ONCE. 

        That's right, just one time! The names are automatically entered onto all other checklists. And this resource is full of other time-saving navigational features to get your classroom organized in an instant. Please check out the preview file to learn more:
        https://www.teacherspayteachers.com/Product/Instant-Checklists-1986258

        Ok, there's actually another best part! How would you like to enter for a chance to win this resource before it goes on sale tomorrow for the big Cyber Monday event?

        You have to act quick, this giveaway will be over at midnight tonight! And there's more...the winning entrant will also score two other resources, from two of my wonderful blogging friends (and incredible upper-elementary teachers!). Please click on over to their blogs to enter for more chances to win the three resources:
        Can you share with us? How do you like to keep track of things in your classroom?

        Making Beautiful Plans with Planbook.com

        $
        0
        0
        Tips for color-coding a beautiful and easy-to-read online plan book.
        I've been using Planbook.com for a couple of years now and I just love everything about it. From attaching the printables I use every year, to linking websites we'll need in a lesson, to setting up templateseverything about this site is convenient and saves me a great deal of time when lesson-planning.

        And it's beautiful.
        (Which is important to many of us, isn't it?)

        I was not asked to blog about this plan book service, I just had to write another post about it because I love it so! All boxes have this great, clean layout and lots of color options. In the past, I used the same colors I use for color-coding my subject areas.

        This school year, I've changed things up and tried out some different color schemes. And I learned a couple of new tricks that have kept my plan book looking beautiful and easy-to-read when I am on the fly.
         photo Screen Shot 2015-12-06 at 4.52.57 PM.png 

        I like to use gray as a neutral color for the non-academic parts of our day, so my eye will go right to the subject areas I need to see.
         photo Screen Shot 2015-12-06 at 4.53.09 PM.png 

        You can easily combine whatever colors you like best for your subject areas. Planbook.com also arranges the colors in rows of complementary shades...you can see them if you look horizontally at each row (it took me awhile to realize that, I'm embarrassed to say!).


        This helped me choose the color family I wanted to use (ok, who are we kidding? Color families...I've tried several this year!). Right now I'm working with the pinks, purples, and blues (calming tones for a calming planning experience, ha!).

        The actual color-coding part is easy. Simply click on the class and then the class color.

        The next part is kind of fun. I like to colorize some of the text within each subject, so that the words stand out, rather than reading through a lot of black text. I colorize each section of our lessons, from the Essential Question to the Closing, and everything in between.

        This helps me find each part of the lesson very quickly. And it just looks nice.

        The great thing is, you can set this up in a template that will automatically fill out all of your lesson boxes for the year! Here's how you can do this...

        Go into your plan book and click on the subject you want to set up first. Start to type the template as you would like it to appear.
        (I write the beginning of the Essential Question and the numbers for the steps of the lesson, so I can just highlight and type right over the black text later.)

        I make any text I want to colorize bold, so it will really stand out. Then, I go into the html formatting part, where you see the < >. This is the source code.

        Now you can tweak any parts of the code to get the exact look you want. I changed my font to Century Gothic. To change the color, highlight the hex color code (the # and letter/number combination).

        You can choose a similar color to your lesson box by using a color-picking tool if you have designing software with that feature. Or you can use an html color picker like this site (click the image for the link).
        http://www.w3schools.com/tags/ref_colorpicker.asp

        Type the hex color code each time you see it appear in this html section. I colorized four sections of my lessons, so I have to change the hex four times.

        Now your text will match your lesson box and really stand out.
        You can now make a template of this, so it is placed throughout your planbook...all color-coded and ready to go. First click on the lesson template you would like to copy. Select all of the text inside and copy it.

        Close this lesson box and go to the menu at the top right hand corner of your plan book. Select Templates from the drop down menu.

        Add a new template.

        Choose the class for this template.

        Then paste in your formatted text.

        Now you can choose the dates you want this template to appear (I just chose the rest of my school year) and that's that! Once you have done this for each of your classes, your color-coded lesson boxes will be ready for you to make some beautiful plans!

        Do you use Planbook.com? Can you share your tips with us?

        Math TIME: Rotations At Their Pace

        $
        0
        0
        I have attempted to get math rotations going in my 5th grade class for years now. I tried different acronyms and setups, but I could never remain committed to them.

        It all felt too rushed...the students would settle into an activity and then it would be time to move on again. Those who needed more time had to abandon a task. Others who were ready to move on turned to socializing instead (!) and it just didn't feel like the best use of time.

        This year, I was determined to implement rotations with success in my classroom. As it turned out, I just had to make one simple adjustment to make rotations work for our class...
         

        I took away timed rotations and assigned groups.

        No more did I mandate when my students would move from rotation to rotation. In fact, they were given choice as to which rotation they would visit (after completing their independent work). When the work at a particular rotation was complete, they would move naturally to the next.

        And though it sounds very simple, it has made all the difference in managing rotations this year.

        So I wanted to share the way we work through our math rotations, in case it is something that would work well for your class (and teaching style).

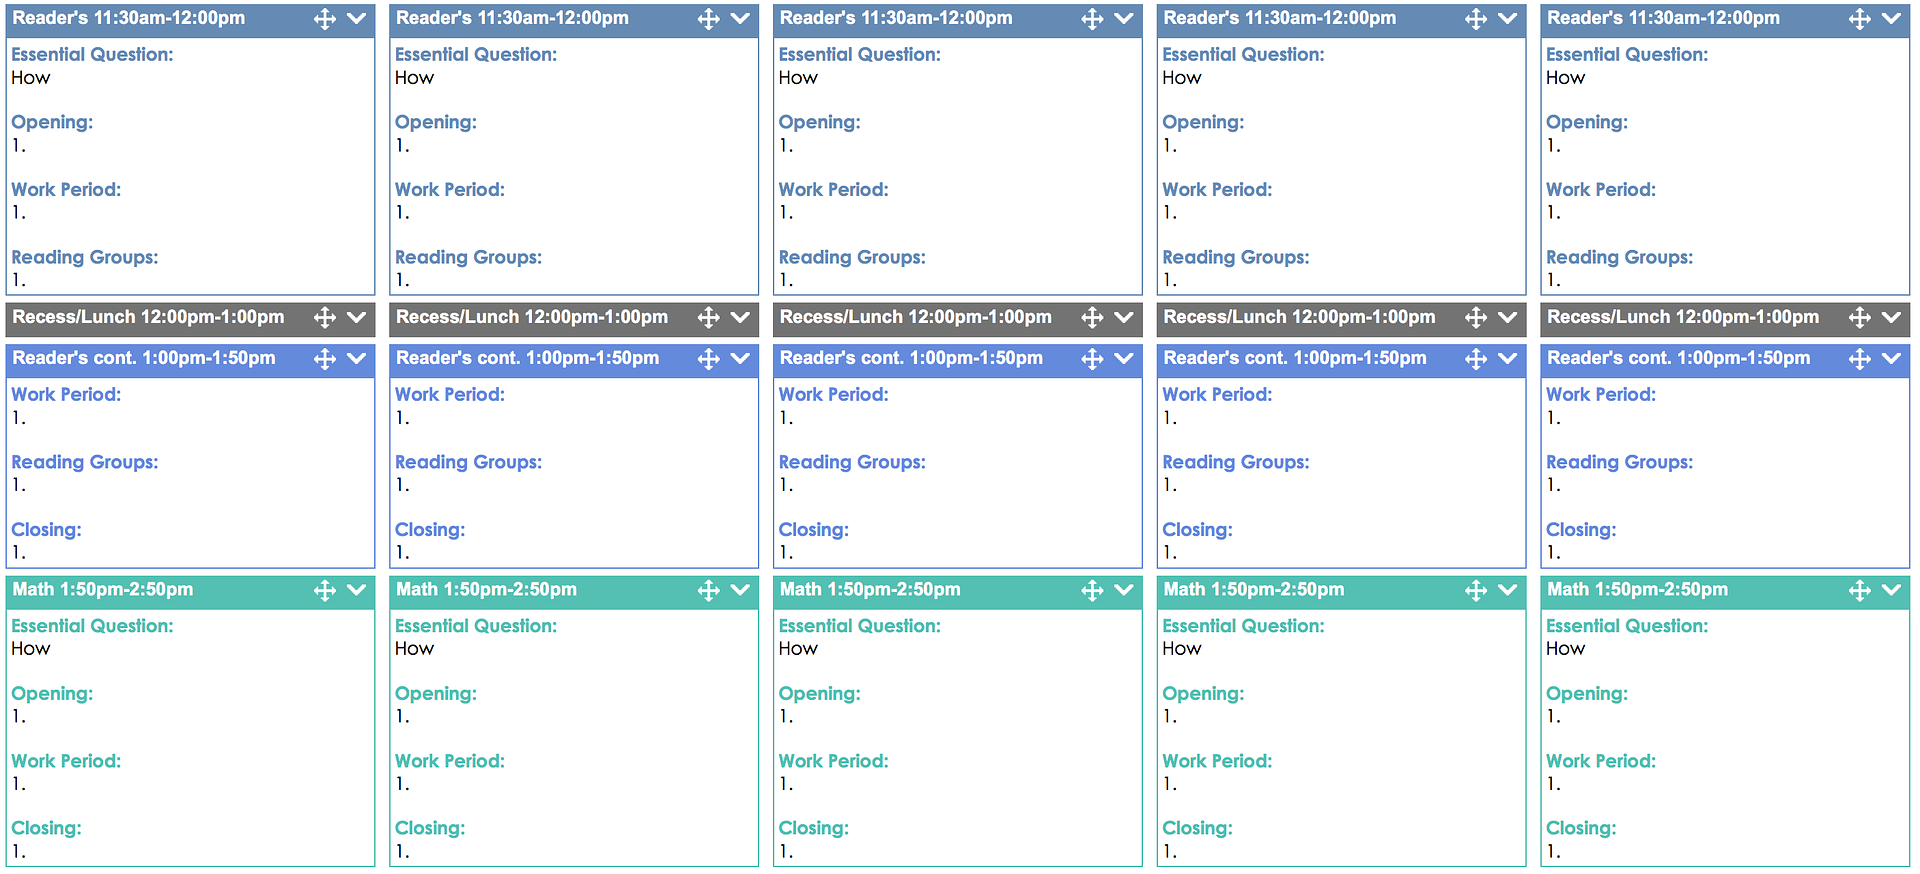
         An Overview of Math TIME


        Math TIME features four rotations: Technology, Independence, Making Meaning, and Extension. These rotations are explained in detail later in this post. 

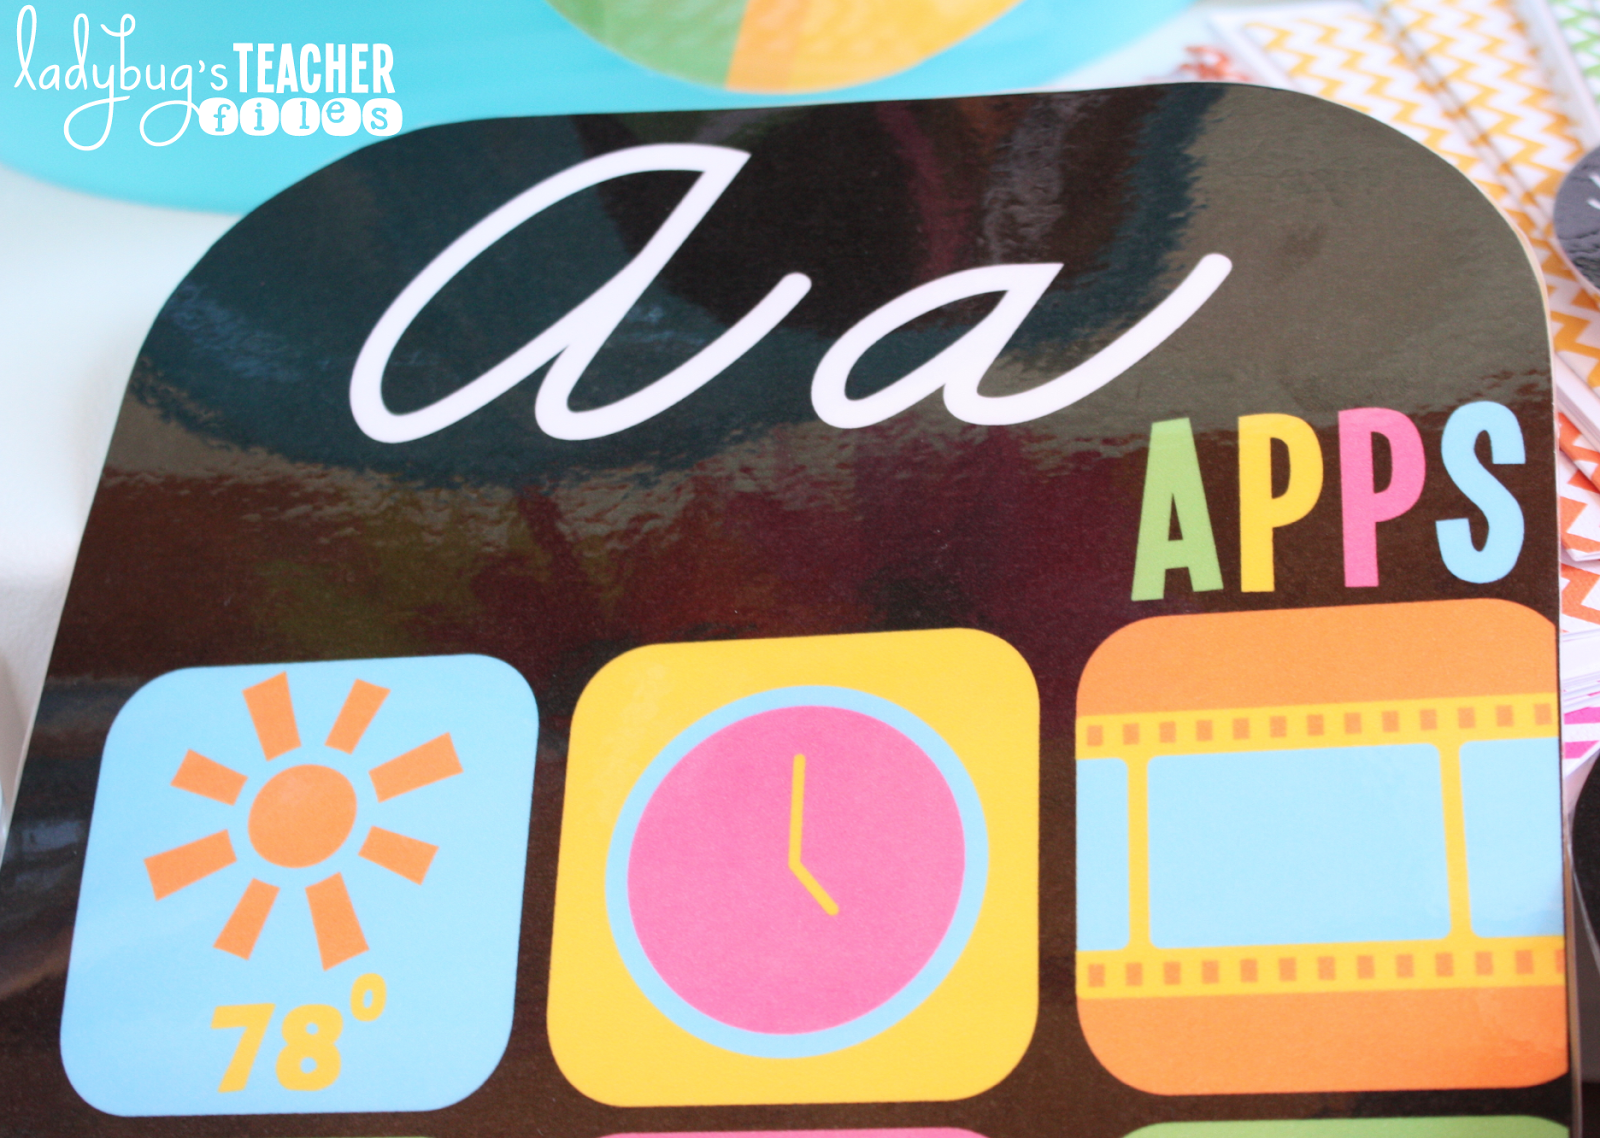
        Some rotations must be completed daily (Technology and Independence). Other rotations are due by the end of the week (Making Meaning and Extension). All due dates are shown with a simple icon on each rotation board:

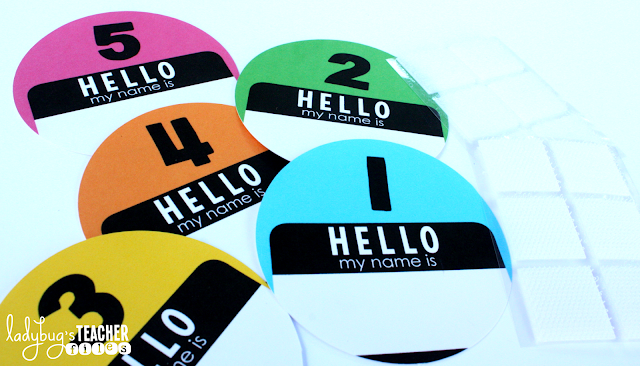
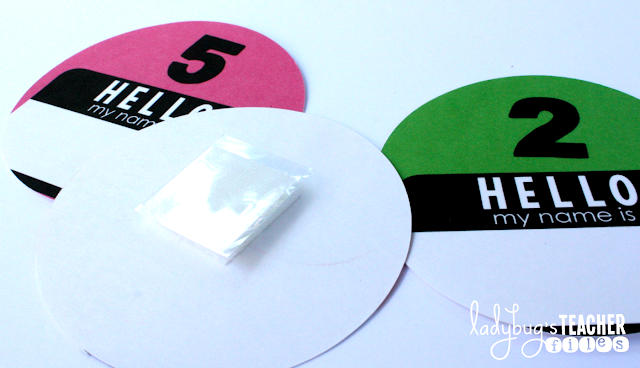
        I also use number icons to show how many students can work on a particular activity (usually the M rotation will call for groups of students):

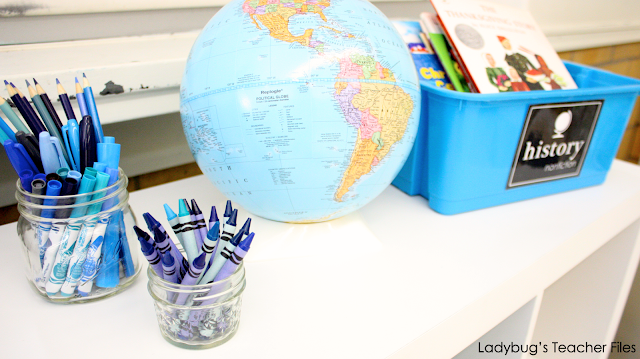
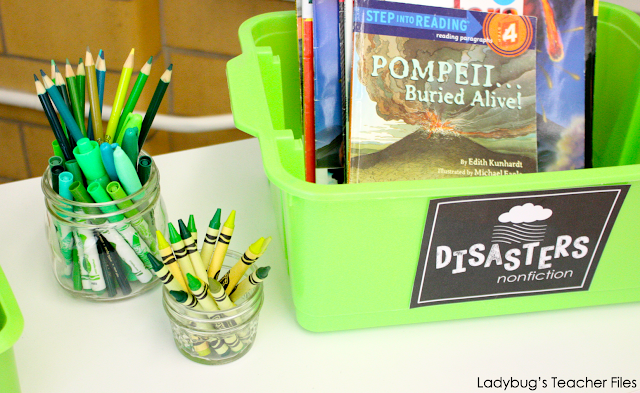
        Bins with coordinating icons and letters are used to store rotation materials:


        As well as our paper trays, to turn in assignments as they are completed:

        Our Math Block

        We go through rotations most days of the week. There are times when we work as a whole group during our math block on a project, review session, or an exploratory activity. However, I am finding it increasingly easier to just incorporate those types of activities into our rotations.

        Our math schedule is as follows:

        1:30-1:50   Mini-Lesson
        1:50-2:10   Group One
        2:10-2:30  Group Two
        2:30-2:50  Group Three 

        These groups are the ones I meet with, while the rest of the class is going through the rotations. The groups change as we begin new units, or as I find concepts my students need to review. 


        These group DO NOT necessarily travel together through the rotations. They are only grouped for instruction with me.

        This allows my students to move naturally through the rotations, which are as follows...
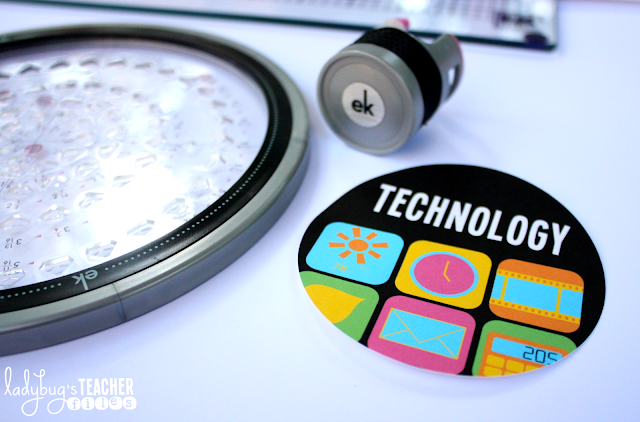
        T: Technology

        The technology rotation always includes an XtraMath session. We take monthly fact fluency assessments in our district, so this daily fact practice is extremely important...and of course fact fluency is crucial anyhow!

        When my students get close to mastering a particular operation in XtraMath, they begin to track their progress and narrow down the facts they need to work on to increase their fluency.

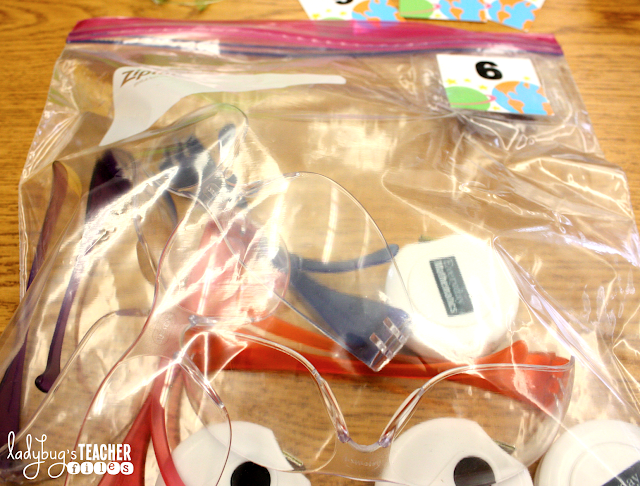
        I have one bin for technology:

        The technology bin has data tracking papers for all operations, as well as blank index cards:
         (the tracking sheets are an awesome, free resource courtesy of The Busy Bilingual Teacher!)

        Once students have finished their XtraMath session, they stop on the final progress screen:

        They use a green marker to quickly check off the facts they know on the corresponding tracking sheet:

        For the facts they still haven't mastered, students grab an index card and record the problem on one side:

        And the answer on the other:

        Students can then use these cards to practice those remaining facts in a particular operation.

        The technology rotation can include other websites as well. We visit Study Jams, interactive games for various concepts, and Front Row (an INCREDIBLE free website that also tracks student progress).

        I: Independence


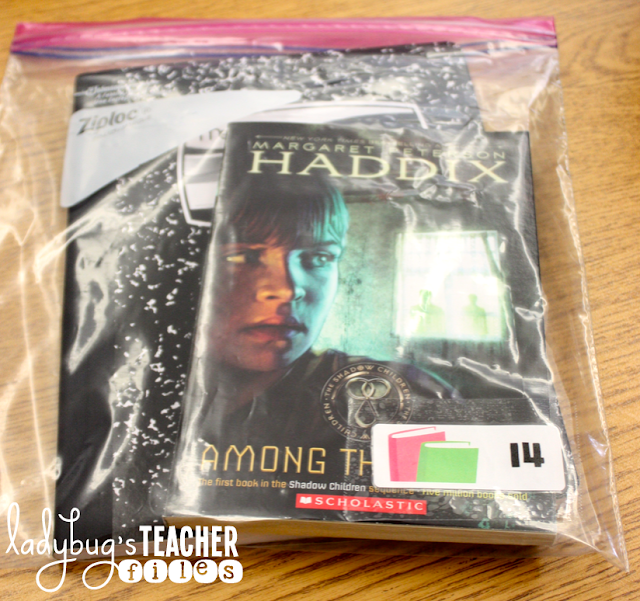
        Like many other rotations out there, our math TIME includes an independent work component. This is usually a page from our math workbook (we are using My Math this year):
         (these are our extra copies of workbooks, my students store their books in their number drawers)

        Since the workbook page is just a basic skill set on the lesson we covered, most students are able to work on this with no problem. If I know a particular group will need more support on this page, I pull that group first. Once students are finished with their workbook pages, they turn them in at the corresponding paper tray:

        M: Making Meaning


        The rotations for M provide a chance for my students to show their understanding of concepts. These activities can involve manipulatives, games, task cards...any activities that will give my students a chance to practice their learning. 

        (these decimal task cards are from Teaching with a Mountain View, a favorite in our class!)

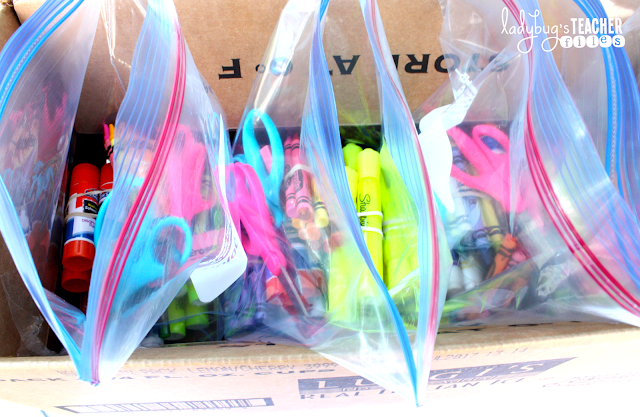
        I have more bins for M than any of the others. They are filled with a variety of activities for 2, 3, or 4 students:

        This is one of our other favorite rotation activities, Math Tiles by Got To Teach:

        Most recently we have been working on the Equivalent Fractions Math Tiles, but there are many other options in this series. The students must solve the math on the page, using digits 0-9. It is the PERFECT thought-provoking, self-checking activity for math rotations!

        I slip the sheets into page protectors and keep the number tiles (I purchased those on Amazon) in sandwich baggies:

        The M bins are so easy to set up! I keep the activities in them for at least a week...sometimes longer for more popular activities, or ones that require more time.

        E: Extension

        This is probably my favorite of all the rotations. Each week, I choose two menu items for my students to complete by Friday. They, of course, love having the choice. I love finding activities that are challenging, ones that require them to demonstrate their understanding.


        Our menu choices often come from Math Reflection Fans, anEXCELLENT resource created by Runde's Room. Jen makes it so easy to find engaging, high-level activities for the students!

        I select the menu items and type them up in a graphic organizer that is a combination rubric/rotation tracker for student accountability:

        This is something newer I have recently added to our rotation work. My students record the assignments for the day/week. Then they check the rotations off as they are completed.

        They select a menu option to complete by Friday:

        And I use the rubric and comments section when grading the extension activity:

        I keep these math menus in the E bin and students get them as they are ready to begin working on this rotation. I hole punch the menus ahead of time, so they can be stored in my students' binders:


        Once students are finished with this activity, they turn in their work to the corresponding paper tray and staple this rotation/menu sheet to their work:
        (this is a quiz one of my students created a few weeks back)

        If you would like a copy of the Rotation Sheet, please click the image below (there are editable fields for the options, as well as a second page with an editable rubric):
        https://drive.google.com/file/d/0B2ARzMSbNzXNYUlQTzctVE56d2c/view?usp=sharing

        The Best Things About Math TIME

        There are so many things I love about Math TIME, I could go on and on. Here are some of the best parts of our Math TIME:
        • We do the same math work we've always done, but it is now student-directed. For example, instead of assisting the whole class during an activity, the students can work on their own while I work with groups who need more support or challenge work.

        • Since my students have choice (which we all know they love!) they are completely engaged. This makes it much easier to take my small groups for instruction, as all other students are focused and on task.

        • The responsibility is ideal for upper-elementary students. They learn how to use every moment of our math block because they know they have assignments due today, as well as a long-term assignment or two for the week.

        • The rotations provide work for my early finishers. In the morning, any students who finish our daily morning work will often ask to work on a math rotation, especially the extension piece. They are very committed to this work because it is their choice. I love that they are using their extra time to work on math!

        • The planning for math is so much easier with rotations. I plan a week's worth of rotation activites. It takes very little time to find engaging activities for each rotation (thanks to Teachers Pay Teachers!) and then I just have to plan my mini-lessons and small group instruction.
        This is still my first official year with rotations and I know I have more to learn. But I cannot emphasize enough how much easier it has been to get the work in when my 5th graders are directing their own learning.

        If you are interested in trying this rotation model, I do have the Math Rotation Board available in store (please click the image to see more):
        https://www.teacherspayteachers.com/Product/Math-Rotation-Board-2403582

        I hope this post was of help if you have been rethinking your rotations! And we would love to learn from you...how do you manage math rotations in your classroom?

        ________________________________________________________________________________________

        Do you teach a primary grade? My sister Melissa (Fashion Craze Learning Days) is a Kindergarten teacher who follows this format of student-directed rotations. She and I have talked incessantly of how well this works in our classrooms, though we teach completely different grade levels! If you'd like to learn more about how she manages centers with student choice in her classroom, please click on the image below:
        http://www.fashioncrazelearningdays.com/2016/02/kindergarten-math-centers-part-1.html

        Keeping it Together with a Classroom Binding Machine

        $
        0
        0
        I know I've talked incessantly about my love of binders on here over the years. And, while they are still so appealing in their sleek, organized way...I have found a new true love this year.

        My Pro-Click Binding Machine

        I first learned about this beautiful tool on Reagan's blog, Tunstall's Teaching Tidbits: How Do You Spell?? (Reagan's blog makes me wish I taught a primary grade every time I read about her incredible ideas!)

        I was not asked to advertise this product in any way and you know I only share the things I truly adore with you...and this is definitely one of them!

        Maybe I should backtrack a teeny bit. You know those comb-binding machines many schools have? They're nice, but the combs never last. In our class, anyhow. This is a common occurrence over time:

        And you know that just means those pages are going to start slipping out. 

        Totally frustrating.

        Which prompted me to hot glue each of the little combs closed, just so they wouldn't rip off. You can see it in this ancient post here: Publishing Student Books That Last! It worked, but you can imagine how tiresome this became over the years.

        Needless to say, I was so excited at the prospect of a new binding machine. AND it was just cheap enough for me to spend some extra cash to get one for my classroom (ie no more waiting in line to bind!). I got my machine on Amazon for about $59 and the spines comes in a box of 45 for about $8.

        It is SO worth the money.

        Binding is such an easy (and more permanent!) process now. You can put in about 5 sheets at a time, line them up, and slide the lever to punch the holes:

        The machine punches all these cool little circles: 

        Then you just line up the binding and click each one closed (makes a satisfying little snap too!): 

        And that's that! You have a lovely little book all bound and ready to go!

        Do you know what the best part is? The bindings are super-strong and last all school year!

        No more twisted and broken combs, no more pages falling out...it's a dream come true! (Can you imagine if a non-educator was reading this post...they'd probably be rolling their eyes! But you get what I mean, right?).

        Though I could easily bind everything in sight (because I love it so) I do try to curb it a bit to avoid endless spine-purchasing. I use these for my students'Morphology Dictionaries, published writing pieces, and my daily checklists:

        https://www.teacherspayteachers.com/Product/Instant-Checklists-1986258


        I hope this was of some help if you did not know about this machine! It is simply wonderful for the classroom and would be an even better deal to purchase and share school wide.

        Thanks so much for visiting! Happy Mother's Day to all the incredible teacher-mothers out there!!! :)

        Getting Things in Order (Keeping Track of Student Papers)

        $
        0
        0

        It's another beautiful month of Bright Ideas!

        And I'm sharing a little system that helps me get things in order every day. Namely paperwork. Because we all know how quickly paperwork can get out of order, don't we? 

        Especially those quick-to-accumulate student papers!

        I know there are so many wonderful ways to organize student papers out there, but here are the steps that really help me keep track of everything from my students:

        1. Number and Highlight
        My students record their class number in the top, right-hand corner of each assignment. They also highlight this number (to make it more visible):

        2. Order the Papers
        A student collects all of the papers and organizes them in number order. This is done during a transition to a new subject and a friend at their table usually helps them get set up while they sort. They beg me to do this.  :)

        3. Pass Paperwork into Color-Coded Bins
        The student who has sorted the papers in order drops them into the color-coded bin, for the particular subject we have just covered:
        (you can read more about our color system here: Color-Coding the Classroom)

        4. Check and Grade
        When I'm ready to check and grade the papers, I pull them from the bin. I look for any missing papers (which is really easy to see, since they are in order!).

        After correcting, I enter them into my gradebook app, which has my students listed in number order--it literally takes less than a minute to enter all grades!

        5. File for Home
        Finally I file the papers to send home each week. I use hanging folder labeled with my students numbers. Again, since the papers are all in order, this file just takes a few moments:

        And that's it!

        Simple, easy-to-manage, and quick!

        I hope this was of help if you are looking to tweak your system, or perhaps if you are just starting out in your teaching career :)

        Would you like to see some really bright ideas? Of course you would! Just click away on any of these lovely blogs below:

        A Parent Volunteer Gift Idea

        $
        0
        0
        For the first time EVER I am actually ahead of schedule for my parent volunteer gifts!!! And they are ready just in time for Tara's lovely...
        http://4thgradefrolics.blogspot.com/2014/06/monday-made-it-summer-weekly-2.html
        They are also ready for you, in case you would like to use any of the ideas or free files in this post!

        So. I am very fortunate to have two room parents who have coordinated all of our major festivities this year...and they have done so much to create those memorable moments for our class. 

        I knew I wanted to find a different way to show thanks, so I thought of wrapping up a bit of summer for them!

        My sister (Fashion Craze Learning Days) and I had a blast shopping for these. Here are the goodies I found:

        Plastic Mason Jar
        These are so trendy right now and I was psyched to find some that are dishwasher-safe for my families!

        Summer-Themed Gifts
        First we gathered summery (is this a word?) gifts for under a dollar each. Can I tell you how much I love the color-scheme of these Kool-Aid packets? These are for the kids in the family:
         
        Iced tea for the adults:
         
        A huge bubble wand:
        And one of those wooden plane-things (REMEMBER those?? Takes me back...):
        For the larger part of the gift, I also got a few giftcards to the movies:

        Mason Jar Label
        Here's the best part of the whole gift...I had an excuse to make a new label! I used a simple phrase and design, printed it on cardstock, then taped it to the jar.

        Then I made a second little tag with the thank you message for each of my families:
         (I erased the names on the card if it looks a little funny)

        And here they are, all ready to go!
        They were so much fun to put together!

        If you are still in school and would like to try this idea for your volunteers, a complete list of materials is below:

        Walmart
        plastic mason jar
        bubble wand
        Kool-Aid drink packets

        Michaels
        wooden airplane-thing
        (for lack of the actual name...I'm ready for summer vacation!)

        CVS
        movie giftcards

        Thank You Labels and Tags
        please click on the image to download for free:
        https://drive.google.com/file/d/0B2ARzMSbNzXNNkdZWFM3dXZNSlU/edit?usp=sharing
        I hope some of you might be able to use these...thanks so much for visiting!

        Customize Your Covers on Pinterest

        $
        0
        0
        Happy Summer everyone!! I think I can officially say that to all of you now, right? :) And summer freedom means more time to join in with Tara for her weekly Monday Made It, one of the best parts of summer!
        http://4thgradefrolics.blogspot.com/2014/06/monday-made-it-summer-week-5.html

        So, like any teacher, I have a looooong list of things to work on during the free time of summer. And one of my first tasks was to tackle my boards on Pinterest.

        Because I seriously had to be the worst pinner in the world. 

        My boards were a mess, my pins were totally intermittent, and I literally cringed every time I looked at my boards.

        So I decided to get on track as a pinner by reorganizing my boards and bringing a little cohesion to everything:
        I am a HUGE admirer of so many boards that are gorgeously organized, with the perfect photograph chosen as the cover image. But I am not very good about that part, so I went with the other option and designed my own board covers.

        I designed all of my covers in Fireworks, a graphics software I use for practically everything I make. But you can also design these covers in Powerpoint (my other true love!) and the steps are as follows:

        1. Set Up the Board Image

        Open a new file in Powerpoint. Using the Shapes tool, draw a rectangle. I found this excellent site that shares all of the sizes of the various Pinterest features: The Pinterest Cheat Sheet to Image Sizes

        The board covers on Pinterest are 217 x 147 pixels...which is roughly 3.01" x 2.04" so I set the rectangle to this size:

        2. Text Time
        Then I used a couple of textboxes to write the board name. For mine, I left a lot of space on the bottom and I'll explain more about that at the bottom of this post:

        3. Take a Picture
        Well save it as a picture, really. Use the "Select All" command, then right-click (or control + click on a Mac) to get the "Save as a Picture" option:

        4. Name It
        Name your new little picture, so it will be ready for uploading:

        5. Upload Your Cover
        Head into the board you would like to customize first (in this example, I am in myAdmire Beautiful Classrooms board). Click on the + sign to add a pin:

        Then, click on the arrow for the Your Computer option:

        Next, upload the image you created:

        Make sure your image is on the board you would like it to appear on:

        Then describe the pin...I just give it the name of the board, as it is the new cover for that board:

        Edited to add another important step!!!
        Much thanks to my sweet friend Diane from Fifth in the Middle who has done this process in the past. Diane tells us that you can link your board itself to the cover images you design.

        Simply go to one of your boards and grab the URL of that board:

        Then paste that link in the box next to "Source":
        Your board cover will now take your fellow pinners right to that board! Thank you so much Diane!!!

        All that is left is to set your new image as your board cover:

        A couple of things to consider:
        • Branding: If you are a blogger and would like your boards to represent you and your brand, you can use a color scheme that matches your blog. The end result will be a page that looks like your blog and is easily recognized by your readers, which is great for branding.
        • Layout: I am a tad obsessive over these kinds of things, but there is really is a lot you can do with the layout and design of your cover. You can crop the images/graphics for that look everyone loves. You can use a variety of fonts for a fun look, or the same fonts for cohesion. Even of the positioning of the images and text on the cover can have an impact. I left some space at the bottom of my covers so that number of pins text could stand out nicely on its own:

        As you can see by my boards (Ladybug's Teacher Files), I still have a lot to learn and a LOT to pin! Do you have any tips you would like to share with us about Pinterest? I would love to learn more from you!
        Viewing all 179 articles
        Browse latest View live