Quantcast
Channel: Ladybug's Teacher Files
Viewing all 179 articles
Browse latest View live

Evolving my Teaching Practice (Spelling With Morphology)

$
0
0
There are so many things I love about my job, from working with my wonderful students each day to learning from my blogging colleagues to organizing my classroom (you know I love that, right?).

But one of my absolute favorite parts of teaching is the process of growth.

Our practice is ever-evolving, isn't it?

I learn so many new things each year, ways to make my teaching better, more methods to meet the needs of different classes. It's this constant push, a chant I can almost hear in my head...better, better, better, I can make it better.

And it's this drive to evolve my practice that keeps me eagerly looking forward to each new school year.

This is true in so many subjects I teach...particularly in my spelling and vocabulary instruction this year.

I've talked so often about our Morphology Dictionary and how much it has impacted the learning in my class. It's been wonderful, but this doesn't mean there wasn't room for growth!

So I worked and worked to evolve my spelling and vocabulary instruction even more this year.

I took all of the roots with common themes from the Morphology Dictionary and began to build related lists of affixes and roots:

I combined small groups of different pieces of morphology into related categories:

I made little icons to illustrate each category, to provide a visual for my newcomer EL students (as well as my mainstream students!):

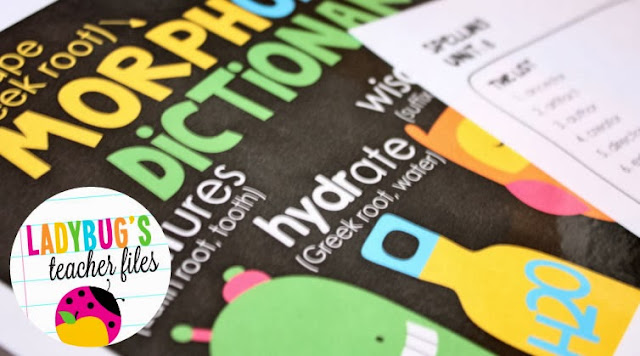
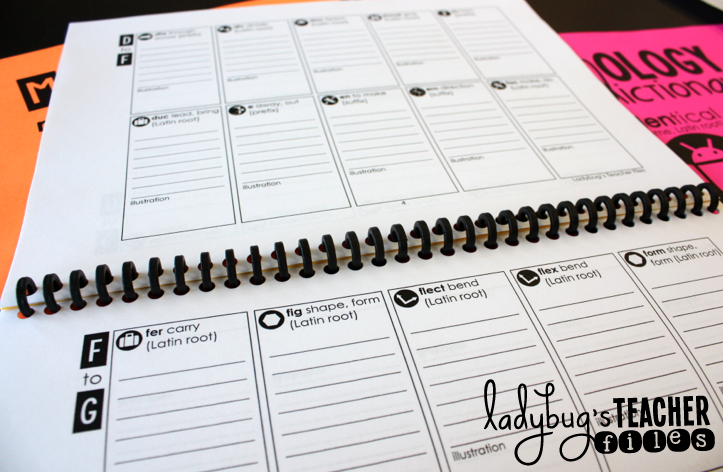
I reworked the Morphology Dictionary into a smaller, more streamlined format (just six pages back-to-back!) to correlate directly to these spelling words.

I made the icons in the new dictionary match the spelling sheets, to help make the meanings more concrete:


Once everything was made thematic and related, it made my instruction so much easier.

Here's a breakdown of how we use these resources in our class...

We begin each new spelling unit on Monday with a pretest (we take all of our assessments on Spelling City). Before my students even look at their spelling sheets for the week, we identify common roots and affixes among the list of words. We list and categorize the words together on the whiteboard. Then we look for the theme among the roots.

My students share theories for the category of the week, backing it up with evidence tied to the word meanings.

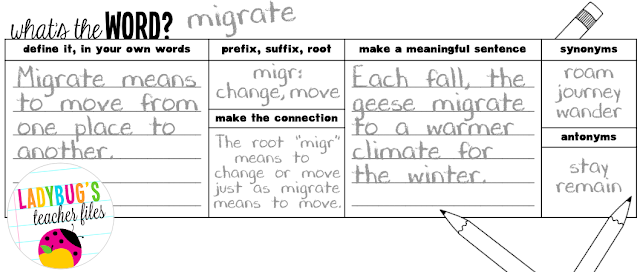
Today, for example, we worked with duc, fer, and port. The general consensus was to lift or carry (thinking of the word support and transport).

We then look up the meanings in our Morphology Dictionaries:
(I ran the cover off on neon paper and bound ours, but they can easily be stapled as well).

We search for the affixes and roots for the week:


And record our spelling words in the dictionaries:


We make a quick illustration to support the meaning of the affix or root:


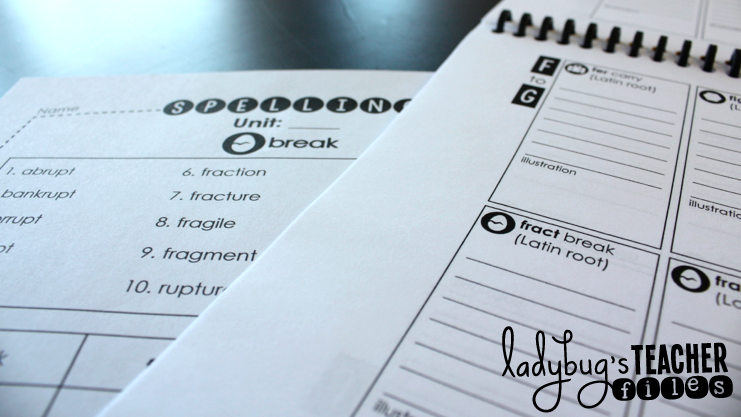
Then we finally get to the spelling list! We highlight our morphology for the week:

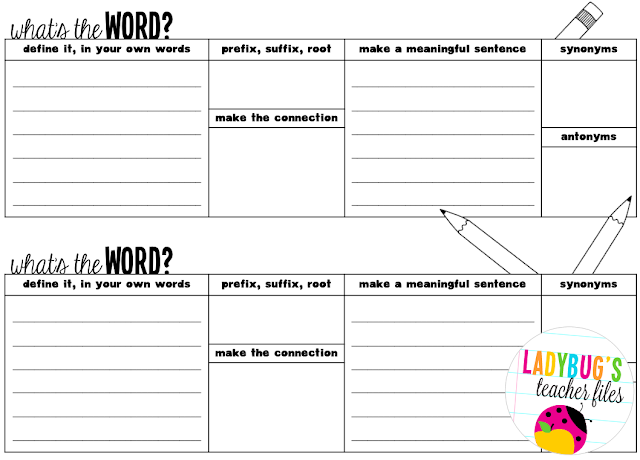
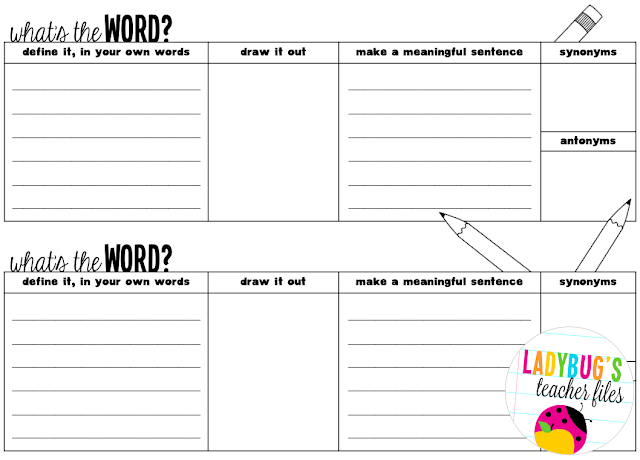
And sort the words with the built-in graphic organizer:

We record connections to the root. In the example below, the root sign means "mark". Students write a connection to the definition of the word, using this morphological meaning:


This sets up our study focus for the week, which includes the traditional word work activities. We focus heavily on definitions and sentences that demonstrate our understanding of the words, along with our spelling practice.

After our spelling tests each Friday, we also take a vocabulary test. I take a selection of the words (the students don't know which I will choose!) and they must write sentences that demonstrate the meaning each word.

Now that our spelling lists are related, the connections between the morphological meanings of the roots and the definitions of words has been so much stronger! 

It has worked out to be such a nice evolution of our morphology study :)

Of course, I still utilize our larger Morphology Dictionary resource because it has TONS (over 7,500!!) affixes and roots. And, if you've purchased Morphology Dictionary in the past, you will find this new spelling resource if you re-download the file:
http://www.teacherspayteachers.com/Product/Morphology-Dictionary-Ready-Made-Spelling-Lists-and-Student-Dictionaries-680661

The spelling lists and matching dictionary described in this post can be found in my latest file here:
http://www.teacherspayteachers.com/Product/Spelling-with-Morphology-An-Entire-Year-of-Differentiated-Spelling-Lists-1233025
I would love to give away a few copies now! If you would like this new spelling resource, please leave a comment with your email address below. I will send it out to the first three readers to comment The first three comments have been selected, thanks everyone! :)

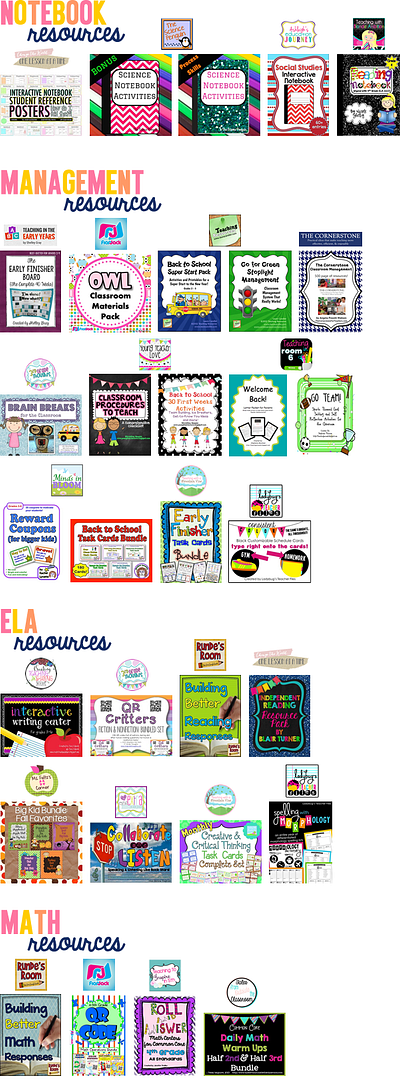
You can also find these morphology resources on sale with my other teaching resources and classroom decor starting tomorrow!

http://www.teacherspayteachers.com/Product/Academic-Morphology-Parts-of-Speech-Poster-Set-1001343

http://www.teacherspayteachers.com/Product/Academic-Morphology-Transitional-Words-Posters-Notebook-Templates-1034697

http://www.teacherspayteachers.com/Product/Genre-Library-Labels-Consistent-Colors-769423

http://www.teacherspayteachers.com/Product/Student-Toolbox-Labels-Consistent-Colors-804262

http://www.teacherspayteachers.com/Product/Bright-Customizable-Schedule-Signs-Consistent-Colors-831539

http://www.teacherspayteachers.com/Product/Black-Customizable-Schedule-Signs-Consistent-Colors-831478

http://www.teacherspayteachers.com/Product/Black-With-Brights-ZB-Manuscript-Alphabet-Line-Consistent-Colors-785779

http://www.teacherspayteachers.com/Product/Black-With-Brights-ZB-Cursive-Alphabet-Line-Consistent-Colors-782605

It's the big Teacher Appreciation Sale and it all starts tomorrow!
http://www.teacherspayteachers.com/Store/Ladybugs-Teacher-Files
I have a TON on my wishlist...and it's all items I know will help make my teaching practice grow even stronger in the future! 

Thanks so much for reading, Happy Teacher Appreciation Week my friends!!

Keeping it Together with a Classroom Binding Machine

$
0
0
I know I've talked incessantly about my love of binders on here over the years. And, while they are still so appealing in their sleek, organized way...I have found a new true love this year.

My Pro-Click Binding Machine

I first learned about this beautiful tool on Reagan's blog, Tunstall's Teaching Tidbits: How Do You Spell?? (Reagan's blog makes me wish I taught a primary grade every time I read about her incredible ideas!)

I was not asked to advertise this product in any way and you know I only share the things I truly adore with you...and this is definitely one of them!

Maybe I should backtrack a teeny bit. You know those comb-binding machines many schools have? They're nice, but the combs never last. In our class, anyhow. This is a common occurrence over time:

And you know that just means those pages are going to start slipping out. 

Totally frustrating.

Which prompted me to hot glue each of the little combs closed, just so they wouldn't rip off. You can see it in this ancient post here: Publishing Student Books That Last! It worked, but you can imagine how tiresome this became over the years.

Needless to say, I was so excited at the prospect of a new binding machine. AND it was just cheap enough for me to spend some extra cash to get one for my classroom (ie no more waiting in line to bind!). I got my machine on Amazon for about $59 and the spines comes in a box of 45 for about $8.
It is SO worth the money.

Binding is such an easy (and more permanent!) process now. You can put in about 5 sheets at a time, line them up, and slide the lever to punch the holes:

The machine punches all these cool little circles:

Then you just line up the binding and click each one closed (makes a satisfying little snap too!):

And that's that! You have a lovely little book all bound and ready to go!

Do you know what the best part is? The bindings are super-strong and last all school year!

No more twisted and broken combs, no more pages falling out...it's a dream come true! (Can you imagine if a non-educator was reading this post...they'd probably be rolling their eyes! But you get what I mean, right?).

Though I could easily bind everything in sight (because I love it so) I do try to curb it a bit to avoid endless spine-purchasing. I use these for my students'Morphology Dictionaries, data binders, and for their major published writing pieces.

And, in total-un-Kristen-like fashion, I'm actually getting ahead of the game for next year before school's even ended and already prepping our newer Morphology Spelling Dictionaries.
http://www.teacherspayteachers.com/Product/Spelling-with-Morphology-An-Entire-Year-of-Differentiated-Spelling-Lists-1233025

I hope this was of some help if you did not know about this machine! It is simply wonderful for the classroom and would be an even better deal to purchase and share school wide.

Thanks so much for visiting! Happy Mother's Day to all the incredible teacher-mothers out there!!! :)

Getting Things in Order (Keeping Track of Student Papers)

$
0
0

It's another beautiful month of Bright Ideas!

And I'm sharing a little system that helps me get things in order every day. Namely paperwork. Because we all know how quickly paperwork can get out of order, don't we? 

Especially those quick-to-accumulate student papers!

I know there are so many wonderful ways to organize student papers out there, but here are the steps that really help me keep track of everything from my students:

1. Number and Highlight
My students record their class number in the top, right-hand corner of each assignment. They also highlight this number (to make it more visible):

2. Order the Papers
A student collects all of the papers and organizes them in number order. This is done during a transition to a new subject and a friend at their table usually helps them get set up while they sort. They beg me to do this.  :)

3. Pass Paperwork into Color-Coded Bins
The student who has sorted the papers in order drops them into the color-coded bin, for the particular subject we have just covered:
(you can read more about our color system here: Color-Coding the Classroom)

4. Check and Grade
When I'm ready to check and grade the papers, I pull them from the bin. I look for any missing papers (which is really easy to see, since they are in order!).

After correcting, I enter them into my gradebook app, which has my students listed in number order--it literally takes less than a minute to enter all grades!

5. File for Home
Finally I file the papers to send home each week. I use hanging folder labeled with my students numbers. Again, since the papers are all in order, this file just takes a few moments:

And that's it!

Simple, easy-to-manage, and quick!

I hope this was of help if you are looking to tweak your system, or perhaps if you are just starting out in your teaching career :)

Would you like to see some really bright ideas? Of course you would! Just click away on any of these lovely blogs below:

A Parent Volunteer Gift Idea

$
0
0
For the first time EVER I am actually ahead of schedule for my parent volunteer gifts!!! And they are ready just in time for Tara's lovely...
http://4thgradefrolics.blogspot.com/2014/06/monday-made-it-summer-weekly-2.html
They are also ready for you, in case you would like to use any of the ideas or free files in this post!

So. I am very fortunate to have two room parents who have coordinated all of our major festivities this year...and they have done so much to create those memorable moments for our class. 

I knew I wanted to find a different way to show thanks, so I thought of wrapping up a bit of summer for them!

My sister (Fashion Craze Learning Days) and I had a blast shopping for these. Here are the goodies I found:

Plastic Mason Jar
These are so trendy right now and I was psyched to find some that are dishwasher-safe for my families!

Summer-Themed Gifts
First we gathered summery (is this a word?) gifts for under a dollar each. Can I tell you how much I love the color-scheme of these Kool-Aid packets? These are for the kids in the family:
 
Iced tea for the adults:
 
A huge bubble wand:
And one of those wooden plane-things (REMEMBER those?? Takes me back...):
For the larger part of the gift, I also got a few giftcards to the movies:

Mason Jar Label
Here's the best part of the whole gift...I had an excuse to make a new label! I used a simple phrase and design, printed it on cardstock, then taped it to the jar.

Then I made a second little tag with the thank you message for each of my families:
 (I erased the names on the card if it looks a little funny)

And here they are, all ready to go!
They were so much fun to put together!

If you are still in school and would like to try this idea for your volunteers, a complete list of materials is below:

Walmart
plastic mason jar
bubble wand
Kool-Aid drink packets

Michaels
wooden airplane-thing
(for lack of the actual name...I'm ready for summer vacation!)

CVS
movie giftcards

Thank You Labels and Tags
please click on the image to download for free:
https://drive.google.com/file/d/0B2ARzMSbNzXNNkdZWFM3dXZNSlU/edit?usp=sharing
I hope some of you might be able to use these...thanks so much for visiting!

Customize Your Covers on Pinterest

$
0
0
Happy Summer everyone!! I think I can officially say that to all of you now, right? :) And summer freedom means more time to join in with Tara for her weekly Monday Made It, one of the best parts of summer!
http://4thgradefrolics.blogspot.com/2014/06/monday-made-it-summer-week-5.html

So, like any teacher, I have a looooong list of things to work on during the free time of summer. And one of my first tasks was to tackle my boards on Pinterest.

Because I seriously had to be the worst pinner in the world. 

My boards were a mess, my pins were totally intermittent, and I literally cringed every time I looked at my boards.

So I decided to get on track as a pinner by reorganizing my boards and bringing a little cohesion to everything:
I am a HUGE admirer of so many boards that are gorgeously organized, with the perfect photograph chosen as the cover image. But I am not very good about that part, so I went with the other option and designed my own board covers.

I designed all of my covers in Fireworks, a graphics software I use for practically everything I make. But you can also design these covers in Powerpoint (my other true love!) and the steps are as follows:

1. Set Up the Board Image

Open a new file in Powerpoint. Using the Shapes tool, draw a rectangle. I found this excellent site that shares all of the sizes of the various Pinterest features: The Pinterest Cheat Sheet to Image Sizes

The board covers on Pinterest are 217 x 147 pixels...which is roughly 3.01" x 2.04" so I set the rectangle to this size:

2. Text Time
Then I used a couple of textboxes to write the board name. For mine, I left a lot of space on the bottom and I'll explain more about that at the bottom of this post:

3. Take a Picture
Well save it as a picture, really. Use the "Select All" command, then right-click (or control + click on a Mac) to get the "Save as a Picture" option:

4. Name It
Name your new little picture, so it will be ready for uploading:

5. Upload Your Cover
Head into the board you would like to customize first (in this example, I am in myAdmire Beautiful Classrooms board). Click on the + sign to add a pin:

Then, click on the arrow for the Your Computer option:

Next, upload the image you created:

Make sure your image is on the board you would like it to appear on:

Then describe the pin...I just give it the name of the board, as it is the new cover for that board:

Edited to add another important step!!!
Much thanks to my sweet friend Diane from Fifth in the Middle who has done this process in the past. Diane tells us that you can link your board itself to the cover images you design.

Simply go to one of your boards and grab the URL of that board:

Then paste that link in the box next to "Source":
Your board cover will now take your fellow pinners right to that board! Thank you so much Diane!!!

All that is left is to set your new image as your board cover:

A couple of things to consider:
  • Branding: If you are a blogger and would like your boards to represent you and your brand, you can use a color scheme that matches your blog. The end result will be a page that looks like your blog and is easily recognized by your readers, which is great for branding.
  • Layout: I am a tad obsessive over these kinds of things, but there is really is a lot you can do with the layout and design of your cover. You can crop the images/graphics for that look everyone loves. You can use a variety of fonts for a fun look, or the same fonts for cohesion. Even of the positioning of the images and text on the cover can have an impact. I left some space at the bottom of my covers so that number of pins text could stand out nicely on its own:

As you can see by my boards (Ladybug's Teacher Files), I still have a lot to learn and a LOT to pin! Do you have any tips you would like to share with us about Pinterest? I would love to learn more from you!

Organizing Running Records

$
0
0
Running Records. Love the assessments, can't stand storing the materials. You should have seen the mess I've had over the years. Oh wait, you can! I have photographic evidence...
(promise not to pin these two pics?)

So I knew this would be the a great project for me to tackle this summer for Tara's Monday Made It:
http://4thgradefrolics.blogspot.com/2014/07/monday-made-it-summer-week-6.html
Since I work with an international class of EL newcomers and mainstream students (all 5th grade) I encounter quite the range of reading levels...so I need both of the benchmark kits for our running record assessments.

But they are just awful.

The folders are jam-packed and totally disorganized. And they have to hold both the fiction and nonfiction materials, which leads to this:
 and this:
(don't pin these either please, HA!)

So I decided to do away with those separate kits and bought a huge file box. I also purchased green and blue hanging files (to keep consistent with the green and blue benchmark kits I used to have). 

Most importantly, I bought enough folders to separate the fiction and nonfiction testing materials for each reading level:

which means I can easily get into each folder and grab exactly what I need:
 (I have these labels to share at the end of this post)

I decided not to make a label for this box (shocking, huh?) as it's pretty obvious what it is. But I did want to adorn it with some necessary information...namely some district charts I tend to misplace each trimester.

So I typed up the charts and used a little color-coding to identify the benchmark levels for each grade (the numbers on the left chart are used to enter data online for each level). Then I laminated the charts and velcroed them to the box, so I could grab them when needed:

And I did the same on the other side of the box, for the primary grade levels:

Now I have everything I need, all in one happy, organized box!

If you would like to use the file folder labels, please click on the image below:
https://drive.google.com/file/d/0B2ARzMSbNzXNbDNRMmNFRnNlNUE/edit?usp=sharing
This system would also work well for organizing your guided reading materials. Hmmm...I may have just found my next Monday Made It project! 

I hope some of you can use the file, thanks for visiting!

Decimals on the Diamond...a World Series file to share!

$
0
0
Well, living in New England certainly is exciting these days...especially if you are a fifth grader cheering on the Red Sox in the World Series!

Me? I'm more of a football girl (Go Pats!) but I did want to do something small to capitalize on all that World Series mania going on with my students. And it really worked out perfectly because we are currently studying decimals (comparing and rounding decimals, 5.NBT.3 and 5.NBT.4, to be exact!)

So I made a little activity that we are going to use in math tomorrow along with the stats for the Cardinals and Red Sox on this page:
 (click on the image above to hop over to the MLB site)

This activity features three pages of questions asking students to compare decimal averages of various players, as well as rounding these averages to the tenths and hundredths. I really hope that it will be of help if you happen to be studying decimals as well!

Please click on the preview below to download the file...
Are you and your students watching the World Series? Who are you rooting for?

Meaningful Word Study...thanks to Morphology!

$
0
0
One of my absolute FAVORITE things to teach each week is Word Study. Words have always fascinated me...their origins, their meanings, their power when used in speaking and writing. And, I've found over the years, it's really easy to get 5th graders excited about the power of words as well!

Which is why our Morphology Dictionary is the heart of spelling and vocabulary learning in our class.

My students use this dictionary with each new set of words we study. They just love to find common affixes and roots, as well as learning their meanings. I love how I am able to create high-level, meaningful, and differentiated word lists for my students each week.

And it's really easy to do!

I start each new unit by looking over the content we will be covering for the week...especially in Science, Social Studies, and Math.

I find all of the key vocabulary we will encounter during the week:
and find affixes and roots to support these words from the Teacher Word List resource that comes with the student Morphology Dictionary:
(there are over 7,500 words to choose from in here, so I can usually find some words to connect to our learning for the week!)

I check off the words I'd like to use and create a list for my upper-level group first (this is usually a 25 or 30 word list). This word list will be used for a spelling test on Friday, as well as a vocabulary test every couple of weeks.

After creating the first list, I eliminate some of the more complex words and create subsequent lists for my 20 Word and 10 Word groups:
I work with a very diverse population of 5th graders and we always, always say how everyone learns the material they need. But what I love the most is that we all learn the same thing, just differentiated for our needs.

So, each Monday, students receive their new list, pull out their Morphology Dictionaries, and start identify common affixes and roots they see within their lists. 

We share out our findings on the document camera and highlight those affixes and roots:
Next, we record them in our Morphology Dictionaries:
On our word list sheets (which the students take home to study) we record any prefixes, suffixes, and roots we've identified:
as well as their meanings, as found in our dictionaries:
This is my second year of using our Morphology Dictionary and it has truly transformed the way my students approach words. They think deeply about their meanings and make connections throughout the week...nothing warms my heart more than to hear "hey, this word has the root 'pop' like population!". It is the best :)

If you are interested in the spelling sheet we use, you can download it and customize it here (it's in a Powerpoint format):
https://drive.google.com/file/d/0B2ARzMSbNzXNdlJ6Q3Q0WlM4M0k/edit?usp=sharing
If you would like to read more about the Morphology Dictionary, you can see it in store (at a discounted price) by clicking the image below:
http://www.teacherspayteachers.com/Product/Morphology-Dictionary-A-Student-Reference-Book-of-Prefixes-Suffixes-and-Roots-680661
Thank you so much for visiting! Up next, classroom tour!

What's the Word? (and incredible online dictionaries!)

$
0
0
Hello, my dear friends! I am taking a break from lesson-planning this afternoon to share a few resources I have made for my students for their homework assignments, along with some wonderful online dictionaries we love to use in class.

First up...What's the Word?

So. As part of our Daily/Weekly Homework Assignments, my students must complete the usual spelling sentences and definitions. I feel it is extremely important to know the meanings of our weekly spelling words...but, if I am to be completely honest, the basic sentence/definition format is feeling a bit stale.

As part of our morning work in class each day, my students complete a word analysis sheet, analyzing one of the words from our Morphology Dictionary in depth (definitions, part of speech, synonyms, antonyms, and more). They really enjoy analyzing the words in this way and we have wonderful discussions about their meanings and related words during morning meeting.

So I decided to use this kind of format for our homework as well. My students will be given a What's the Word? sheet for each night.

Here's an example of how it will be filled out:
The "prefix, suffix, root" and "make the connection" part will be completed with our Morphology Dictionaries...this is an important way for my students to understand the meaning of these words, as well as make connections to other words with the same affix or root.

If you would like to use this file for your class, I have it available in Google Docs, just below. I also included a different version, with a place for an illustration instead of the affix/root connection, in case this works better for you.

Please click on the image below to download this file:
https://drive.google.com/file/d/0B2ARzMSbNzXNYS1HRjFONkwzb2s/edit?usp=sharing
Next up...some incredible online dictionaries!

I have long been a fan of Wordsmyth...it's this online dictionary that has different reading levels to choose from when looking up words:
http://www.wordsmyth.net/
I have this dictionary linked up on our Classroom Website and my students use it every day during our word analysis in the morning--it is such a great resource!

So, needless to say, I was ecstatic to learn that Wordsmyth was offering a newdictionary edition as well...one with visual and audio!

The Wordsmyth Kids Dictionary is perfect for my newcomer English Language Learners!
http://kids.wordsmyth.net/wild/
It offers a ton of words, along with audio and images for many of the words:
http://kids.wordsmyth.net/wild/
I just love how I can differentiate the definitions for all of my students, so they can access the meanings at their particular levels :)

I really hope this was of some help! Do you have some favorite word resources to share with us?

Thanks for visiting!

Clipart by Miss Tiinna at www.misstiina.com

Teachers Thanking Teachers Giveaway!

$
0
0
Thanksgiving Day is my absolute favorite holiday. I just love the simplicity and sincerity of it...how we take the time to gather and celebrate with those we love.

It's funny. Before I began blogging, I never would have imagined how much I could love so many people I had never met in real life before. 

But now, after years of collaborating with you all, I know how important our online community is to my teaching. I am so thankful for your friendship, your readership, your advice, and everything I've learned from you...you all have helped me grow so much as an educator.

Because of all this, I am VERY excited to join 14 phenomenal, upper-elementary bloggers in a series of wonderful giveaways this week! Would you like to learn more? Here are all of the prizes you could win...

One: From me, to you :)
As a very small way of saying thanks to your friendship and readership, I would like to give one lucky winner a gift card to their choice of stores...

Amazon
Target
or
Teachers Pay Teachers

I know these are always the first places I always shop, thanks to the constant inspiration of our teaching community!

To enter, please see the Rafflecopter below:
a Rafflecopter giveaway
And there's more!!! 

Two: Teachers Thanking Teachers Giveaway
a Rafflecopter giveaway

Three (and more!): Individual Giveaways from my Friends!
(visit each of these blogs for a different giveaway!)

Best of luck and thank you again, my dear friends, for everything you have taught me all these years!

Smooth Sailing Back to School Tips and Giveaways

$
0
0
Hey everyone! I hope you've had a chance to sail over to my friends' blogs and read their advice for smooth sailing into a new year. We want to share our tips, tricks, and some great giveaways to get you on your way to a new (and smooth) year!


For my school year to get off to a smooth start, I always need to have everything ready to go and at my fingertips, so I don't have to lose a moment searching for anything. Here are some of the best ways I have been able to have everything ready and instantly accessible for those beginning weeks:

1. Make Student Supplies Easily Accessible
I like to have all the supplies my students will need during the day right at their fingertips (no roaming around the classroom!!). So last year I tried Student Toolboxes:

These toolboxes hold everything we normally use in a school day and worked like an absolute dream! No supplies were lost, no supplies were put in the wrong places...everything was right where we needed it:

With all student supplies are easily accessible in one places, activities and transitions run more smoothly, leading to increased instructional time. 

2. Number Student Storage Areas
Those of you who have read my blog over the years know I like to use a numbering system. This is an organizational technique that has helped me in so many ways--especially on the first day of school.

My class list tends to be in flux during the first couple of weeks. Students move away over the summer, newcomer EL students arrive in those first weeks (and not necessarily the first day).

With numbers, I am able to set up the whole classroom in advance, without any names, until my students arrive:

This allows me to have all my students' materials right at my fingertips...actually, at their fingertips!
If you are a fan of the numbering system, pre-numbering student areas will allow you to have all student materials and paperwork ready to go for those first days, before your students even arrive.

3. Label EVERYTHING!!!
This probably sounds like an obvious statement, but I have learned over the years that the more I label every single thing in my room, the less I misplace.

This is the case with my teacher toolbox:


Subject area baskets:
and so many other parts of our classroom.

If something is labeled, you will always put it back where it belongs and be able to find it at a moment's notice.

4. Get Ahead on Copying
This is something I have started getting better about more recently, thanks to the incredible units out there on Teachers Pay Teachers. With so many in-depth and long-term resources, it is possible to prepare units well in advance.

I will be copying numerous resources to get my students and I set up for the month of September, allowing me to have all the papers we need at our fingertips.

Here are just a few of my favorites I'm already prepping for September:
http://www.teacherspayteachers.com/Product/Interactive-Math-Journal-315177
http://www.teacherspayteachers.com/Product/Calendar-Math-for-the-Upper-Grades-5th-Grade-Starter-Kit-776253
http://www.teacherspayteachers.com/Product/Spelling-with-Morphology-An-Entire-Year-of-Differentiated-Spelling-Lists-1233025

The more you have copied and right at your fingertips, the more time you will have to focus on building those crucial classroom routines in the beginning weeks.

5. First Day Organization
And then there's the first day itself.

No matter how long I've taught I still get those jitters...and that leads to a scattered "Um, where were we? What are we doing next?" feeling that I just cannot have on that first day.

So I made a first day of school sheet to keep track all of the important things I would like to remember for the day.

There are places to record the activities and routines I'll cover for each subject, any important notes from parents I meet that morning, dismissal notes for the first day, things to prep for the next day, and more. I'll be keeping this sheet on a clipboard with me throughout the first day.

Please click on the image below if you'd like to download a copy for your big day:
https://drive.google.com/file/d/0B2ARzMSbNzXNWDFjSjlnRmJpMEU/edit?usp=sharing
Keeping all important information for the first day of school at your fingertips will keep you on track, allowing you to focus on the most important thing--welcoming your students to a new year!

Now it's time for the giveaways:
 
To help you sail smoothly into a new school year, I'm giving away a $50 Really Good Stuff eGift Certificate...I know that most of my organization over the years has been thanks to their bright, beautiful bins!!

And here's something really exciting: your entry in this giveaway will also automatically place your name in our collaborative giveaway, where one lucky intermediate teacher can win all of the items featured below (click on the images to take a closer look at the resources you could win):
HTML Map
That's a prize pack of almost $300 in products to get you ready for a new year!

I'm giving away a copy of Spelling With Morphology featuring differentiated spelling lists for an entire school year...just choose the focus for the week, print, and you and your students are ready for meaningful spelling and vocabulary instruction:
http://www.teacherspayteachers.com/Product/Spelling-with-Morphology-An-Entire-Year-of-Differentiated-Spelling-Lists-1233025

I'm also giving away a copy of my schedule signs, one of the easiest ways I keep my class informed and on track. They're totally customizable, so you can create the exact schedule you need:
http://www.teacherspayteachers.com/Product/Black-Customizable-Schedule-Signs-Consistent-Colors-831478

a Rafflecopter giveaway

Be sure to visit my friends' blogs to read their tips and tricks, and all about their giveaways...each blog is giving away $50 in gift cards for a total of $1,000!

For each giveaway you enter at our blogs, you also earn a chance to win the collaborative prize. Best of luck to you all and thanks so much for stopping by! :)


Back to School Sale!

$
0
0
http://www.teacherspayteachers.com/Product/Simply-Iconic-Customizable-Library-Labels-1367784
Soooo...it's back to school time, though I don't want to believe that quite yet! I'm enjoying the sun, sand, and ocean waves on vacation right now. But I would interrupt any vacation, no matter where I was, for a Teachers Pay Teachers sale!!

My cart is full. And I'm ready to shop. A lot. 

Because there's nothing better than downloading all those shiny new products to use during a new school year!

My store will be on sale as well, with the items I use with my own 5th grade class each day. Here are a few of the go-to resources in our classroom, from spelling and vocabulary instruction to organization and decor:
http://www.teacherspayteachers.com/Product/Spelling-with-Morphology-An-Entire-Year-of-Differentiated-Spelling-Lists-1233025
http://www.teacherspayteachers.com/Product/Morphology-Dictionary-Ready-Made-Spelling-Lists-and-Student-Dictionaries-680661
http://www.teacherspayteachers.com/Product/Academic-Morphology-Transitional-Words-Posters-Notebook-Templates-1034697
http://www.teacherspayteachers.com/Product/Black-Customizable-Schedule-Signs-Consistent-Colors-831478
http://www.teacherspayteachers.com/Product/Student-Toolbox-Labels-Consistent-Colors-804262

And I have to tell you. I am CRAZY excited about my newest library labels:
http://www.teacherspayteachers.com/Product/Simply-Iconic-Customizable-Library-Labels-1367784
I have been working on them for months and months and they are going to update the whole look of my classroom (I'm keeping the same color scheme of black and brights, but moving some things around and changing up others...more to come on that soon!).

These labels were designed to have a unique, modern look and have so many options, from customizable designs to different shapes to black or white (to save ink).
More to come on those when I get myself out of the sand and back in my classroom!

So, starting Monday (tomorrow!!!) my store and so many others will be listed at 20% off...AND an additional 10% off with the promo code BTS14!

And I'm so excited because these incredible women will also be joining the sale...I'll know where I'll be shopping tomorrow!

Thanks so much for stopping by...and happy shopping!

Classroom Sneak Peek and Desk Plates to Share

$
0
0

I know so many of you are already back to school and I have been admiring your gorgeous classrooms! We don't head back until after Labor Day, so I'm still working away on my room. I did want to share a little sneak peek of what's going on though.

I am keeping the black with brights theme I've had for a couple of years now. There is nothing I love more than fine-tuning a classroom scheme and evolving it a bit each year...plus my students love those colors so I am committed for another year (or more??).

Here are a few things I've been tweaking so far...

New Contact Paper
If  you've followed the blog for awhile, you will know I love to cover my mismatched tables with contact paper. Last year, I went with black paper and it looked really sleek and modern...but in the end it was a lot of black along with my bulletin boards and I knew I would change it up a bit in the future. Here's a picture of last year's tables in black:

The tables in our classroom have about five different wood grains, so I decided to choose the...well...for lack of a better word, prettiest one to use this year! Three of our round tables are a warm, maple color. So I found some contact paper that matched really well at a local hardware store and have been covering all those mismatching tables with a new shade this year. 

Here's a darker table being transformed with new maple contact paper:

New Carpet
I found a new carpet back in June at Target for a nice sale price and I actually purchased two because they are my students' favorite alternative seating (besides our little couch, more to come on that later!). This is a messy-work-in-progress shot that shows the carpet design:

New Library Labels
The carpets actually led to a new library label inspiration. I knew since the spring I wanted a black and white label with an icon look this year... and I tried out a different shape as well. These labels are from my Simply Iconic Library Labels set and they have a regular rectangle shape as well (plus a white with black option):


New Dry Erase Features
I've also been having a lot of fun using dry erase shapes to tie in with that icon-looking layout for my morning meeting area. 

I used my circle cutter to make this calendar, so my 5th graders can write the date each day:
I realize it is still slightly askew (it's that Thursday column!!) but it was about 9,000% humidity the other day and we don't have AC at school...I will fix it next time.

And then I tried to this one look notebook paper-ish...

I have a couple of others I'm working on as well--they've been a lot of fun to make and they really stand out on the black contact-papered boards!

New Desk Plates

I've also reworked our desk plates since last year, after careful observation of how my students (especially the ones who really need these references) use them each day. 

I've always made my multiplication charts alternate colors in columns like this...it really helps students track the numbers with their finger and not get confused. I enlarged the charts as much as possible for the best readability and left a small space to write the name...since it's 5th grade and the name is more for substitute teachers.

I have a copy of the desk plate to share below...please click on the image if you would like to download:
http://bit.ly/1tRgt6Y
I have tons more to share but I don't think I'll have a full classroom tour until a couple of weeks into September...I hope you'll have a chance to visit the tour then, I feel so behind everyone else!

Are you still setting up your classroom? Or have you been back to school already? Thanks so much for stopping by!

Inbox Overflowing?

$
0
0
Perhaps this post would better titled as "Confessions of an Email Hoarder" because that's exactly what it felt like every time I opened my school email over the years!

But now that's all in the past.

Thanks to four easy steps, I've whittled my inbox down to one of the most beautiful sight a teacher can behold:
And though I know there are so many of you who are way more organized than I am, I wanted to share what has worked for me...just in case there is a fellow email hoarder out there ;)

Step One: Answer Anything You Can Immediately
If there's any email I can respond to right away, I do. I scan my inbox for parent and administration emails and take care of those quickly. 

If I answer emails from my administration or colleagues right away, I delete them. This clears a lot of mail very quickly! For parent emails, well, that leads me to the next step...

Step Two: File in Folders
Folders are wonderful for all of those emails you would like to keep throughout the school year:
I have folders set up for parent emails, assessment information, EL student information, professional development, and more (as you can see above).

This keeps my inbox empty of those emails I don't need right at the moment, but will need in the future.

Step 3: Flag Emails to Answer Soon
What about those emails you don't have time to answer as your students are streaming through your classroom door? 

Or the ones that require you to sit and think for a bit over a cup of coffee on the weekend? 

These are the emails I flag, to deal with as soon as I canin the near future:
(I actually do email myself all of the time, with links and documents to print!)

Step 4: Copy Information in Your Planbook
This is a newer step for me and has quickly become my favorite trick...it has already helped me so much in the few short weeks we've been in school!

As soon as I receive an email with any upcoming events, I add it right to my plan book (I use planbook.com, you can read more about it here: Make a Digital Plan). This allows me to instantly delete tons of emails. 

Band Demo on Monday? Added to my plan book and deleted the email:

Workshop agenda sent by my principal? Copied and pasted right into my plans, deleted the email right away!

And that's it! With these four easy tricks, I have maintained an organized filing system for important emails and an empty inbox which makes me feel SO much more zen. 

What are your favorite tips for keeping up with email? I'd love to learn some new tricks from you!

Notice & Note: Student Bookmarks

$
0
0
Hello my dear friends! I'm stopping by to share a little something I've made for my students...


And I hope it's something your students can use as well!

This past summer I read Notice and Note: Strategies for Close Reading. Have you ever read a book where you find yourself constantly nodding your head and agreeing? Or saying "oh my gosh!! I needed this LAST year!". 

This is one of those books.

The authors, Kylene Beers and Robert E. Probst have identified six major "signposts" we see so often in children's/young adult literature. From "Words of the Wiser" (where an older character offers advice to the main character) to "Aha Moments" (where the main character suddenly realizes something important)--all of those key moments in a text that our students tend to breeze right past while reading.

At each signpost, students learn to stop and ask themselves a key question. These questions are designed to help students make inferences, determine theme, discover the conflict, and so much more.

The best part?

It is SO simple. Six signposts. Six questions. Yet applicable to all student texts.

The students catch on very quickly and begin to make signpost observations and ask these questions right away, thanks to this simplicity. And it makes it so easy to start "creating a habit of mind" as the authors say, to help students notice and read closely in all texts they encounter.

My 5th graders and I have been going through the introductory lessons so far and I'm looking forward to sharing much more as we learn to read closely together.

Today, I wanted to share the bookmarks I'll be giving my students this week...please click on the image below to download them:
http://bit.ly/signpostbookmark
(there are two versions...I'm using just "Contradictions" in my class, but I included the "Contrasts and Contradictions" bookmark as well)

I also have matching anchor chart printables to share, if you are interested in those...just let me know and I will share them here in the next blog post.

Have you read Notice and Note yet? Have you used these strategies in your class? We would love to hear what you have learned!

Teachers Thanking Teachers

$
0
0
It's almost time for my absolute-favorite holiday of all! And it's not just because I am totally craving mashed potatoes with gravy already (and that's the truth!).

It's because the sheer beauty of a holiday where we take time to share what we are thankful for.

And you know how thankful I am for all you, right? 

I've said it before and I'll say it again and again...I am so grateful for the blogging community and everything it has done for my teaching practice. I have learned an incredible amount from all of you and I am deeply appreciative.

So, as a way to show thanks, I'm joining several of my favorite upper-elementary bloggers to bring you a little Thanksgiving treat:
For the next two days (today and tomorrow!) we will each be sharing a brand-new product...for free!!
* * This offer is now over, thank you so much for joining in with us! * *

My product is the first in a new series of resources I am working on for my classroom. 

I am extremely fortunate to work with an international class of mainstream students and English Language Learners...all fifth grade. It is a wonderfully unique and exciting classroom environment!

This year, I have a large number of ELL newcomers who are just beginning to speak English. So I have been working on resources to help teach them grade level standards (most recently, the Order of Operations) in a scaffolded way, to help them gain confidence and an understanding of the academic language they will need to succeed:

http://www.teacherspayteachers.com/Product/Interactive-Notebooks-for-English-Language-Learners-Exponents-1559886
(click on the image above to download this resource for FREE!)
And it just gets better! You can grab more free resources from these amazing teachers...

Thank you...for your readership, your friendship, and everything you have taught me over the years!!

Thanksgiving Morphology Resources to Share

$
0
0
thanksgiving
Happy-almost-Thanksgiving everyone!! We are in school for a few more days and I've been working on a couple of resources to keep my class following the usual routine, while celebrating the upcoming holiday a bit.

And I'd love to share these new resources...as a small token of my thanks and appreciation for you!

First up, I have some special spelling lists planned for the week. These spelling lists focus on four to six different affixes and roots that all have a Thanksgiving tie-in. These differentiated, editable lists can be found in my store...just click on the image below to download:

I also made a little graphic organizer to help students examine one of these Thanksgiving-themed words in depth:
thanksgiving

There are places to fill out the usual components...the word, definition, part of speech, a sentence:
thanksgiving

There is also a part for students to tie the morphology to the meaning of the word:
thanksgiving

As well as a place to create an illustration and make a holiday connection:
thanksgiving
(Perhaps I should have warned you first, I am not the best artist!! 
My 5th graders are always kind to me about it though!)

If you would like to grab this graphic organizer, please click on the image below:
https://drive.google.com/file/d/0B2ARzMSbNzXNZEtoQlhXM2pPV00/view?usp=sharing

I hope some of you might be able to use these resources!
Unless you are already on your break...which leads me to my big question:

Are you in school this week? Or has your Thanksgiving break already begun?

Save Yourself Some Merry Little Minutes...

$
0
0
The holiday season is here and I can hardly contain the thoughts of baking cookies, shopping, wrapping gifts, and spending quality time with my loved ones.
But wait, I’m a teacher.

I don’t have any time for these things.

I have a trillion things to do!! Trimester assessments, projects, grading papers, publishing writing pieces, report cards...the list goes on and on and I can see my holiday festivity time fading fast.

Or maybe not.

Because several of my upper-elementary friends and I are hoping you will join us in sharing a list of ways we can save ourselves some merry little minutes...and free up some time to enjoy the season!

Here is one tip that has helped me so much already this month:


I know that sounds kind of obvious (or perhaps you are thinking I’m a major procrastinator).

But it works.

Take, for instance, report card comments. They’re extremely important, yet extremely time-consuming. 

And our first trimester report cards ALWAYS fall within the middle of the holiday season (mid-December, to be exact!). Every year I find myself spending hours and hours of precious holiday time typing away on comments for two days straight.


So, last year, I decided to break it down:

I write two report card comments every day, starting as soon as I can.  Two is such a modest, UNoverwhelming number, isn’t it?

Here is why I love the two comments method:

It's Quick

I can spend just a bit of time on them each evening and then put them away for the night.
 
It Adds Up Fast
Though two comments may seem slow, they add up really quickly. Within one school week, I already have 10 comments done!

It's Not Overwhelming
Instead of being faced with the overwhelming task of writing all of the comments in a weekend (and my subsequent avoidance tactics, such as laundry, vacuuming, and other pressing things!) the two comments is oh-so-easy to achieve in one sitting.
  
It Helps Me Maintain Focus
I know which two students I will be commenting about next. Which gives me all of that driving-to-work, drying-my-hair time to think about my meaningful comments, on just the two students. In all seriousness, this is very important to me. I want to make sure I have given ample time and reflection for each child.


So it sounds simple but it has worked like a charm for me...and I hope it may be of some help to you!


And here's something exciting! Many of my upper-elementary friends are also sharing their time-saving tips on their blogs:
Do you have any tips to share in regards to report card comments? 
Or other times savers? I would love to learn from you!

Creating Default Templates in Powerpoint

$
0
0
Creating Default Templates in PowerPoint
 Oh Powerpoint, how do I love thee?

Well, if we're being honest, in many ways...but there are a few I could really do without.

Like those two textboxes that come up every time I make a new printable:

And this default font I NEVER use:

Oh and those horribly-colored tables...
what is with all the different font colors in one table anyhow??
But, like any faithful teacher-creator, I remain loyal to my true love.

And patiently delete textboxes. 
And reformat tables. 
Again and again.

But I couldn't help dreaming...

And it is! Because I have FINALLY learned how to create my own default templates!!!

Would you like to try it out? Just follow the steps below...

  1. Start a new presentation. Select those two textboxes and delete them:

  2. Create a new text box and type anything:

  3. Choose your favorite go-to font (mine's Century Gothic). Then right-click on the text box and choose Set as Default Text Box:

  4. Delete the textbox so you have a blank slide:
     
    You could save the template now and you'd have the font/fonts you'd like all set to go. But if you like to use tables as well, see the next steps:


  5. Insert a table...I just choose a couple of rows and columns to format, you can always add more in the future and your formatting will already be done for you:

  6. Select the table:

  7. Reformat the colors in the way you would like them to appear in the printable:

  8. Select the table and choose the font, font size, and text orientation you want:

  9. Keep the table selected and click on the bold button twice (otherwise parts of your text may show up in bold because of the default formatting):


  10. Type in each cell, to be sure the font appears the way you would like:

  11. Then delete all the cells. I just placed my table near the bottom of the template. I use tables a ton, but if I don't need it, I will just delete it:

  12. Now to save your new default template. Go to Save As:

  13. Name your template and save it as a .pot file:

  14. Now you can open this template and it will be all set with your fonts and layout:

  15. Once you are finished designing in this template, choose Save As (so  you can rename it and preserve the original template):
And that's it!

I seriously could not be more excited about this! And the possibilities are really endless...you can set up a series of templates for all of the printables you make.

I really hope this was of some help to you! If you'd like to learn more about designing printables with Powerpoint, please see this previous tutorial:

    Editable Holiday Coupons for Student Gifts (file to share)

    $
    0
    0
    Ladybug's Teacher Files: editable holiday coupons for student gifts
    Happy Holidays my dear readers! I hope you are already at home enjoying the beginning days of your vacation.

    BUT, just in case you are still in school, I am sharing a little student gift I made for my class this week (we are in school on Monday and for a half day on Tuesday).

    These editable coupons are designed for the new year and can serve as a nice Christmas gift for your class to use in January...or as a Happy New Year gift to surprise your students when they return in 2015!

    These coupons are arranged in a Powerpoint slide. Simply click on each text box and type in the prize of your choice, as well as the expiration date:
    Ladybug's Teacher Files: editable holiday coupons for student gifts


    As an added bonus, these coupons require no cutting. I just ask my students to store them in their number drawers. As each coupon is used, we just cross it off the sheet.

    Please click on the image below to download this file for your class:
    https://drive.google.com/file/d/0B2ARzMSbNzXNZF9HUDhsVmNwNWs/view?usp=sharing

    If you like these coupons, you'll also love this Valentine's set...click on the preview to hop to that post and download—then you'll already be ahead for 2015 ;)
    http://www.ladybugsteacherfiles.com/2014/02/editable-valentine-coupons-file-to-share.html 
    I hope you can use these files, thanks so much for reading!

    Are you still in school this week? When is your last day?
    Viewing all 179 articles
    Browse latest View live


    Latest Images