Quantcast
Channel: Ladybug's Teacher Files
Viewing all 179 articles
Browse latest View live

Teachers Thanking Teachers Giveaway!

$
0
0
Thanksgiving Day is my absolute favorite holiday. I just love the simplicity and sincerity of it...how we take the time to gather and celebrate with those we love.

It's funny. Before I began blogging, I never would have imagined how much I could love so many people I had never met in real life before. 

But now, after years of collaborating with you all, I know how important our online community is to my teaching. I am so thankful for your friendship, your readership, your advice, and everything I've learned from you...you all have helped me grow so much as an educator.

Because of all this, I am VERY excited to join 14 phenomenal, upper-elementary bloggers in a series of wonderful giveaways this week! Would you like to learn more? Here are all of the prizes you could win...

One: From me, to you :)
As a very small way of saying thanks to your friendship and readership, I would like to give one lucky winner a gift card to their choice of stores...

Amazon
Target
or
Teachers Pay Teachers

I know these are always the first places I always shop, thanks to the constant inspiration of our teaching community!

To enter, please see the Rafflecopter below:
a Rafflecopter giveaway
And there's more!!! 

Two: Teachers Thanking Teachers Giveaway
a Rafflecopter giveaway

Three (and more!): Individual Giveaways from my Friends!
(visit each of these blogs for a different giveaway!)

Best of luck and thank you again, my dear friends, for everything you have taught me all these years!

Color-Coding Google Docs Folders

$
0
0
 
I swear, I have always loved color-coding. But this year?

I have gotten totally carried away with it!

I have all of my subjects sorted by color...from the signs, to the labels, to my students' notebooks, and yes...the madness even stretches to my Google Docs for school.

My district signed us all up for district Google accounts this year and it has been wonderful...but a little hard to organize first.

That is, until our lovely Health teacher told me about color-coding the folders! (thank you--even if you don't ever read this!!)

So here's how you color-code the folders...in case you didn't know (like I didn't, until semi-recently).

Click on the Create button and choose a New Folder:
Select the sad, gray little folder:
Then click Change Color from the More menu:
And that's it!

And, because I'm completely type-A (but you knew this long ago!) I had to number my folders when naming them, so they would be in order of my schedule for the day. :)

It's a little thing, but it really helps when you are on the fly during the school day and need to find things fast! I hope this helps, if you didn't know it already!!

Will be back tomorrow to share some new, reusable anchor charts my students and I are using this year...wait 'til you see how UN-type-A I had to be about these charts!! :/

Do you use Google Docs for your classroom documents?

Organizing Files for the Week (& keeping my table clean!)

$
0
0
Happy, Happy Thanksgiving my friends! I hope your day is filled with fun, laughter, and great food!

As a very small way of saying thanks to you today, I have a little organizational file to share.

First, I will be very honest and share a picture of how my table looked a couple of months ago.

Brace yourself, it's not very organized...

and PROMISE you will not pin this image!!!
Ok, I realize it's not the end of the world and please believe me, my table has been MUCH worse but that really is a totally jumbled mess of things stuck in random pretty bins. And I couldn't find anything I needed without an extensive search.

This is why I have to label literally every.single.thing in my room. 

Otherwise I tend to just throw supplies and files into random bins, just to have a clear workspace.

I finally have it under control now, with some new labels and a set of folders...
(see the sunshine all around them, giving them a glow of happiness? That's how I feel when I see my table now!)

I made labels for Monday through Friday and then folders for each subject and part of our day, for each day of the week:
This lets me file work ahead of time (if I'm ever lucky enough to be ahead of schedule!!)

and keeps everything filed away for the day, without looking cluttered:
The best part? 

If we don't get to an activity, or it must be extended to the next day, I just move the folders on down.
I have two additional bins, for Assessment Papers and Important Forms as well:
The Important Forms bin holds folders for permission slips, book orders, popcorn orders, goal forms, class lists...anything and everything I could think of to keep filed away.

I've had the bins set up like this for a couple of months now and everything is just where it should be. Now I can find my files very quickly, even at those really hectic times (which is all the time during our day, right??)


In case you would like to try this kind of system out, I do have the labels above to share, just click on the image below to download:
https://drive.google.com/file/d/0B2ARzMSbNzXNcGxsdzZqSXVPSk0/edit?usp=sharing

I hope there are some who can use this out there! And I hope you have the happiest of holidays...thanks so much for stopping by :)

Getting to the Root (and Affix!) of Vocabulary with Posters

$
0
0
http://www.teacherspayteachers.com/Product/Grammatical-Morphology-Parts-of-Speech-Posters-1001343
It's funny, when I made the Morphology Dictionary for my students last year, I had no idea how much it would change the way I approached teaching vocabulary in my classroom.
http://www.teacherspayteachers.com/Product/Morphology-Dictionary-A-Student-Reference-Book-of-Prefixes-Suffixes-and-Roots-680661
I mean, I  knew it would be an important resource for my diverse population and that's why I worked on it for almost an entire school year but...

I hadn't realized at that time how much morphology would become part of ALL vocabulary we encounter, across all subjects.

From math to social studies, even in reading and writing, my students and I have been getting to the root of key words whenever possible.

Usually this means I scribble the word on the board, circle any roots or affixes, and make the connection to its meaning with my students. Valuable learning for sure, but not the best visual...especially for my newcomer English Language Learners.

So I've been really thinking and working on new ways to take my students' vocabulary learning to the next level, across multiple subjects...in the form of visual morphology posters!
The first set I made was Mathematical Morphology:
http://www.teacherspayteachers.com/Product/Mathematical-Morphology-Posters-5OA1-5OA2-5OA3-992838
 (more to come in this series!)

I designed them to be easy to read across the room, so all of my students can access them with ease:
Each poster has a colorful, visual model:
as well as a connection between the meaning of the term and its affix or root (this part is editable, should you wish to change the phrasing a bit).

Each poster addresses CCSS math vocabulary, as well as morphological standards for 4th and 5th grade...a whole bunch of standards all in one set!

These Mathematical Morphology Posters have worked out so well in our room, I have begun working on others, in a new subject area...Grammatical Morphology:
http://www.teacherspayteachers.com/Product/Grammatical-Morphology-Parts-of-Speech-Posters-1001343

This set is also editable, should you wish to change the phrasing in the definitions:
http://www.teacherspayteachers.com/Product/Grammatical-Morphology-Parts-of-Speech-Posters-1001343
Mine are printed and ready to be laminated today...I can't wait to start using them this week!

All of these morphology resources (and my other items) will be on sale tomorrow, for TpT's Cyber Monday!

(be sure to enter the Promo Code for maximum savings!)
(Many thanks to Krista from Creative Clips for the adorable button!!)

And there's more! I'm so excited about these new posters that I would love to give some away today, to some of you! If you would like to enter for a chance to win a set, please follow the steps below:

Leave one comment below with:
1. Your email address
2. Your choice of posters (Grammar or Math)

and that's it!

I will choose the winners the old-fashioned way (random number generator!) and announce them in the comments section of this post later this afternoon/evening.

Giveaway closed, thanks for joining in!!!

Thank you for stopping by!! :)

Grammatical Morphology Photos

$
0
0
http://www.teacherspayteachers.com/Product/Grammatical-Morphology-Parts-of-Speech-Posters-1001343Helloooo! I wanted to share a quick couple of pictures of the Grammatical Morphology: Parts of Speech Posters. (I felt bad I didn't have photos of them in yesterday's post!)

We began to utilize these posters in our grammar lesson today and they worked out very well. I'm using several of these words for our weekly spelling test (we are focusing on the roots "ject" and "junct", amongst other roots and affixes from our Morphology Dictionary this week).

I taped them to a big empty space I have above our book closet:
http://www.teacherspayteachers.com/Product/Grammatical-Morphology-Parts-of-Speech-Posters-1001343
where they brighten things up nicely and (more importantly!) are easy to read:
http://www.teacherspayteachers.com/Product/Grammatical-Morphology-Parts-of-Speech-Posters-1001343
These posters are on sale (along with my other items) today and tomorrow for TpT's Cyber Monday and Tuesday event! 

Ok, I am off to shop...Happy Cyber Monday!!

Digital Writing Conferences with Google Docs

$
0
0
So, I think I mentioned in a recent post how our district signed us up for Google accounts (in Color-Coding Google Docs Folders). 

And by "us" I mean ALL of us...including our students!

This is great for so many reasons, one of which I'd like to share today.

My 5th grade classes has been working hard on drafting their memoirs. And you know how it goes as you get closer to the end of a big writing piece...those conferences become really important.

I hope I'm not alone in saying this, but I find it really hard to get to everyone as much as I would like. It's like I need five of me to conference.

And that where Google Docs comes in!

Thanks to the sharing feature, my students are able to work on their memoir drafts, share with me, and I can write notes back to them...providing a conference digitally, even if I don't get to see a particular student that day.

And it's very easy to do (which is always a relief to hear, right?)

Students work on their writing piece on their Google account:
Once finished, students share the document with me:
Any shared docs get sent right to my mailbox, so I can see which of my students are ready for my input. 

Then, at home (in the bliss of my fleecy pajamas!) I can write notes for that very important conference, even if we didn't meet that day:
My students go back the next day and work on the checklist, then erase any notes I left them. I always use a colored font, so it will stand out easily.

And that's it!

My 5th graders love this ("Did you see my memoir?""Did you write to me??") and I LOVE that I can touch base with them, even if I didn't get to in Writer's Workshop that day.

Do your students have access to Google accounts? Do you have ideas for student docs to share with us?

Thanks so much for stopping by!

ETA! Thanks to the wonderful Barbara from Fourth and Goal in Fourth Grade, I learned you can use the comment feature in the top, right-hand side of the Google Doc to comment on highlighted sections of the document...SO much better:
Once the students have addressed the comment, they can click Resolved and the paragraph will no longer be highlighted and the comment will be taken off the side. Thank you Barbara!!

Thanks for all of the comments...I love how we can all learn so much from each other :) :)

organizing fonts on your Mac

$
0
0

Hello dear friends!! I hope you have been having a very happy 2014 so far! 

I'm sure many of you know how to organize your fonts on your Mac but, just in case, I wanted to share this very easy technique.

Because, if you're anything like me, you have quite the font collection. Like at least a zillion, right? And that means you might find yourself scrolling endlessly through a list to get just the font I'm looking for. 

Well, on a Mac, there is a quick way to sort these fonts into folders!

Just head into your Applications and find Font Book:

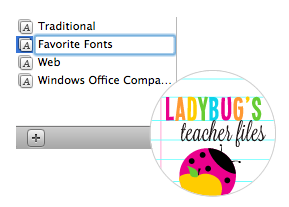
Once you open Font Book, you will see a list of all your fonts, along with some folders that are already there (like Fixed Width and Traditional on mine):

To create a customized folder, click on the + sign at the bottom, left-hand part of the Font Book:


Then just type the name you would like for the folder:

(favorite fonts is my newest category, since I go through those phases where I use the same group of fonts for awhile)

Then, you can click and drag any font from the font list to your new folder:
  

The font can even be stored in multiple folders. For instance, I have this particular font stored in my Favorite Fonts folders, as well as in the KG Fonts folder where I keep all of my Kimberly Geswein fonts (❤):

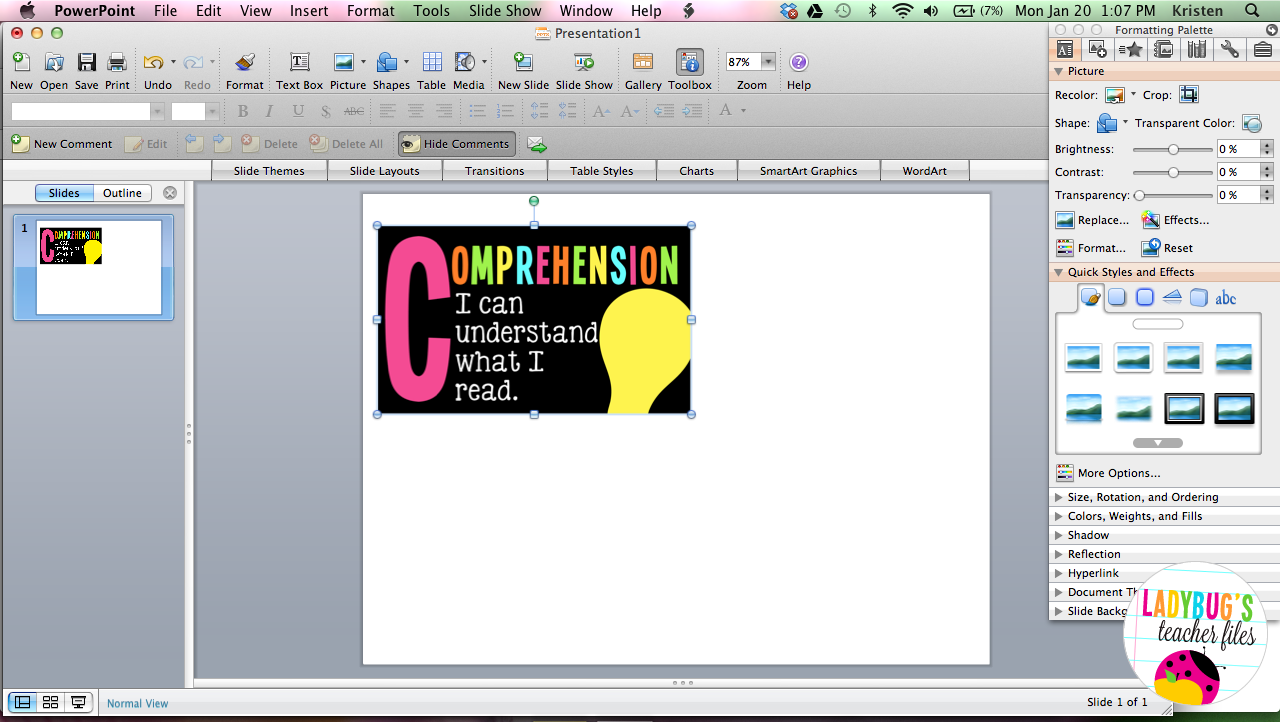
Now when I design in Powerpoint, I can go to Font Collections, select the folder I need, and jump to that font quickly:

And that's that! I hope this was of help if you didn't know about this before...I would love to hear how it works out if you are organizing your fonts for the first time! 

I have 468 fonts right now, and that's after cleaning out of ton of old ones! How many fonts do you have? :)

quickly insert and line up images in Powerpoint

$
0
0
Hello! I'm back to share another little tip that has helped me a great deal when designing in Powerpoint.

Actually, it's several little tips that really save a LOT of time. I'm sure there are many who know this, but I'm hoping it will be of help to those just starting out in Powerpoint :)

The image replacing trick (that you will see below) is one I learned from my sister, Melissa, over at Fashion Craze, Learning Days. It is SO great that I still talk about it all the time (right, Melissa??).

These little tricks will not only help to place images in a file very quickly, they will also help you keep your file neat and consistent throughout.

So. Say you are ready to place a series of images and/or clipart in a Powerpoint file. Normally, to insert a picture, you must go to Insert, choose Picture, and insert an image for each image you need:

(you can also choose the Insert Picture tool button if you have it displayed in your menu bar):

This is pretty easy, but can be really time-consuming if you are working with many images in your file.

That's what makes these next steps so great!

First, insert an image or piece of clipart as you normally would:

Then, select the image and copy it (either from the Edit menu above or Command+C if you are on a Mac):


Drag this copied image just below the original one (you should be able to see the blue gridlines to help you line it up):

Now you have two images lined up perfectly:


But perhaps you need several pages of these signs...now you just have to do a copy and paste. Go to Select All (or Command+A on a Mac) to select both images:

Copy and paste these duplicates on as many slides as you will need for your various images:

Now for the fun part! Go to the first duplicate and switch it with a second image by selecting it and choosing Replace (as shown in the Formatting Palette below, on the right side of the screen):


Once you click on the Replace button, you will be able to choose any image you have and it will switch the picture to that exact location:

Then, you can continue going through the file, replacing all images until you have everything you need:
This allows all images to be lined up in exactly the same format, for consistency and neatness throughout the file! Plus it's wicked fast!! (Sorry, I was so excited my New Englandness slipped out!)

But wait, there's more! 

If you'd like to have LOTS of slides set up with the same image formatting, you can follow this time-saving step as well...

Once you've begun setting up the first couple of slides, go over to the slide menu bar (on the left-hand side of your Powerpoint file). Select all of the slides in this menu bar (either using Select All or Command+A as mentioned before):

Staying in that left-hand menu bar, hit Paste (Command+V on a Mac) to instantly set up identical slides:

You can continue doing this until you have all the pages you will need (I have up to eight pages now, as shown below, and it only took a couple of seconds):

Now, you can go back and do that oh-so-cool image replacing trick to put all the images you would like in your file.

It seems like a lot of steps at first, but it becomes very fluid and easy to set up your file once you get used to it.

Ok, I really hope that was helpful to some of you out there! I would love to hear how it goes, if you happen to try it out.

Do you have Powerpoint image-placing tips to share with us?

P.S. Those updated CRAFT signs you see in this tutorial will be shared here very soon...  :)

Follow the Trail! Huge Giveaway...

$
0
0
Hi everyone! I'm so excited to be joining in with several other intermediate bloggers in a product-swap giveaway! I've been fortunate enough to be partnered with Stephanie, from Teaching in Room 6:
I think I seriously have just about every item in Stephanie's store on my computer and in my classroom, from her Calendar Math to her Paragraph of the Week...her products have always had such an important role in my students' learning.

Needless to say, I was ecstatic when I saw Stephanie had released the Essay of the Month this year:
http://www.teacherspayteachers.com/Product/Essay-of-the-Month-990537
This product is seriously incredible! Stephanie has put together one of the most thorough, easy-to-follow, and useful products I have ever seen! 

The Essay of the Month features daily tasks all designed to get students to produce a well-written, five paragraph essay...within a month! 

That means everything is broken down in nice, organized tasks that seem easily achievable to my 5th grade students. 

Each essay begins with a prompt and month-at-a-glance sheet:

And has tons of wonderful graphic organizers, all designed to organize each part of the essay:
The Essay of the Month covers so many different writing genres, from Opinion to Narrative to Creative to Informational--with 20 prompts in all. And they are REALLY good...you know, the kind your upper-elementary students will really want to write about!

I quickly had a vision of how the Essay of the Month would fit in to the rest of our year (and in future years!). Eventually, I would like my students to be able to work on this as an independent task during Writer's Workshop, as one of our rotations. I know it is something they will enjoy and I know they will be able to complete it independently, freeing up my time to work with other students.

As it was new to my class this month though, we did need to go through it as a whole group for the first time. Luckily, Stephanie created the pack in such an organized manner, it has been extremely easy to incorporate each part of the essay as the mini-lesson for Writer's Workshop that day. 

We began with Informational Writing section, as it dovetails nicely with our nonfiction study in both Reader's and Writer's Workshop. I chose the prompt about team sports (I have a really sporty class this year!) and we all selected a sport we were "expert" on.

After brainstorming ideas for our team sports, organizing our writing into topics, and gathering details for each topic, we were ready to get into the next task...the Topic Sentences.

We started with our Essential Question (based on Stephanie's task for the day):

And got right to work in our writing notebooks, noting the essential question and sharing what we knew about transitional words:

We filled out graphic organizers of ways to show "similarity" and "addition" (our first two focus areas in transitional words):
(this graphic organizer accompanies the Transitional Word Posters we have displayed in class)

After noting the various ways to show similarity and addition, we practiced an example piece (based on a text we had read together in December) so my students would have an example to refer to when drafting their own writing pieces:

After the mini-lesson, my students took these transitional words and applied them to their Essay of the Month, for the work period of Writer's Workshop:

The Essay of the Month has worked like a dream! My students have really enjoyed writing their essays in such focused (non-overwhelming!) segments and I love how easy it is to create the daily writing lessons, based on Stephanie's incredible work!

To enter for a chance to win the Essay of the Month (as well as many other wonderful prizes!) please read all about the hike below...
Hiking Tips 
-Start anywhere along the trail!

-Along the way, stop by each blog and read about the resources swapped between bloggers.

-Enter to win the resource that is featured at each blog in the raffle below (the same raffle is at each blog, so you can just add to your entries as you go!). While you are at each blog, if you’re not a blog follower already, sign on to follow! (You can earn bonus entries for following all blogs once you unlock the additional entries.)

-The raffle is open until midnight on January 31, so feel free to take a break from your hike, rest up, and finish it later! 

One winner will receive the entire set of resources being featured by all 14 collaborating bloggers AND a $25 TpT gift certificate! 


Here’s the list of blogs to "hike" to: 
Swap Stop A

Swap Stop B 

Swap Stop C 

Swap Stop D 

Swap Stop E 

Swap Stop F 

Swap Stop G 
Well, friends, settle in on your couch and grab the granola. It's time to get your hike on! :)

Getting Moving with Task Cards (& Battling Indoor Recess)

$
0
0
Indoor recess.

I could really just stop there because I know you all understand the significance of those two words. Needless to say, we've had a long spell of days spent inside (I know I'm not alone in this!) and I'm looking for ways to get my increasingly restless students moving while learning.

One of our favorite activities this year does just that. And it's oh-so-simple to set up!

1. Grab a pack of task cards. 

There are so many wonderful ones to choose from out there...today we used Coordinate Graphing QR Code Fun from Flapjack Educational Resources...
http://www.teacherspayteachers.com/Product/Coordinate-Graphing-QR-Code-Fun-CCSS-5OA3-5G1-571256
(LOVE these adorable cards!)

2. Cut up the task cards (okay, well everyone knows this part).

3. Cut up the answer key.

4. Tape the task cards and answers (all mixed up) throughout the room:
(this can be done very quickly in the 20 minutes your students are not in the classroom, also with a sandwich in tow as I learned today)

5. Pass out recording sheets and clipboards and you and your students are ready to go!

I spread the task cards and mixed up answers on three of my four walls, so the kids will have plenty of space (and walking room to really get moving).

The students solve the problem, then move through the room until they find their answer they just recorded, leading them to the next card to solve.

With QR cards like Tabitha's, it's even more fun to check the answers once finished (we're a BYOD school, thankfully):

So, nothing really big and something very easy to do. But you know what? My students LOVE when they walk in and see the cards set up like this and I love seeing them get re-energized while working. It's a win-win! Well, win-almost-win because nothing really beats outdoor recess, right? ;)

How many indoor recesses are you up to? This is our seventh or eighth...I'm starting to lose track!
. . . . . . . . . . . . . . . . . . . . . . . . . . . . . . . . . . . . . . . . . . . . . . . . . . .

The Follow the Trail Giveaway is still going on this week! Please click on the green link to read all about an incredible resource from Teaching in Room 6 and to keep hiking!

Utilizing Those Nonfiction Text Features (file to share)

$
0
0
 photo nonfictionfeatures1.png
We are deep into our nonfiction units in both Reader's and Writer's Workshop. In Writer's, my students will eventually create their own informational text. In Reader's, it's all about reading and comprehending a variety of nonfiction texts.

Speaking of that, those nonfiction text features have a huge part in the comprehension of advanced texts, don't they?

featuring...features!

Well, not so much maybe.

My 5th graders know them all by name, they know their various purposes within a text. But were they always utilizing nonfiction text features for information?

I wasn't so sure after a recent benchmark assessment.

Student after student read fluently through the running record book...but completely gliding past numerous charts, diagrams, and captions, all carefully designed to support their comprehension.

vital visuals

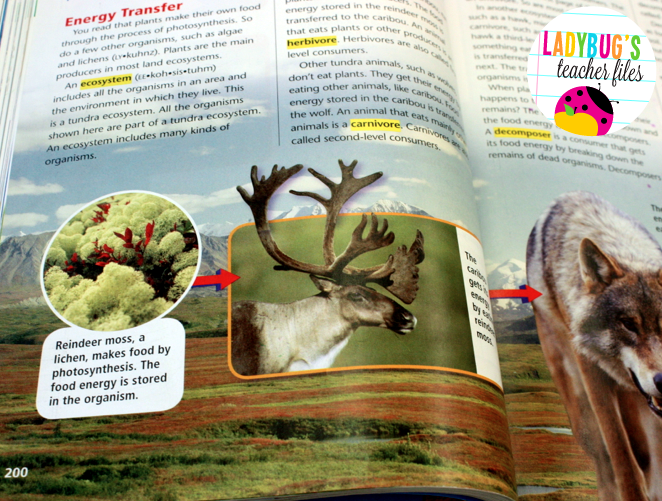
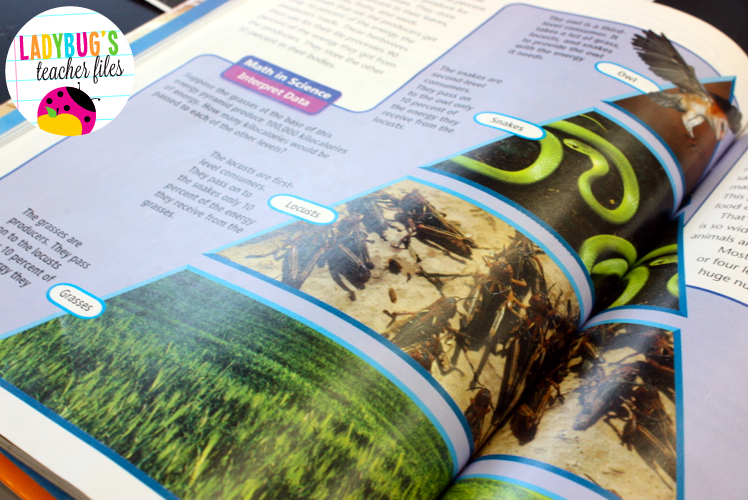
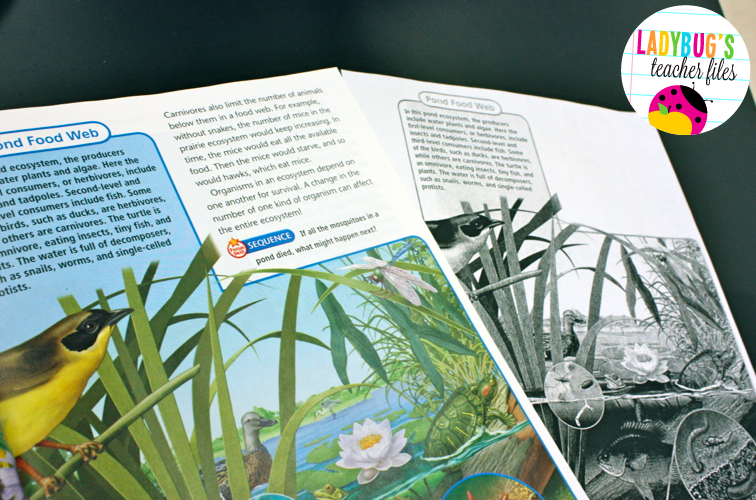
So I decided to turn to our science text which is chock-full of important text feature visuals...especially in the section on ecosystems.
 photo nonfictionfeatures12.png 
This section was actually perfect for such an activity, as the features are key in understanding consumers, producers, decomposers, food pyramids, and so many other terms the students must learn.

I photocopied selections from the chapter, then blocked out all of the regular text, leaving all of the text features alone on the page:
 photo nonfictionfeatures10.png
I then asked my students our Essential Question for the lesson:

how do nonfiction text features help with our comprehension of informational texts?

(nothing better than the combination of Reading and Science, right?)

After a quick discussion of what we already knew about this question, I handed my students the text-less (new word for you!) chapter selection along with a graphic organizer.

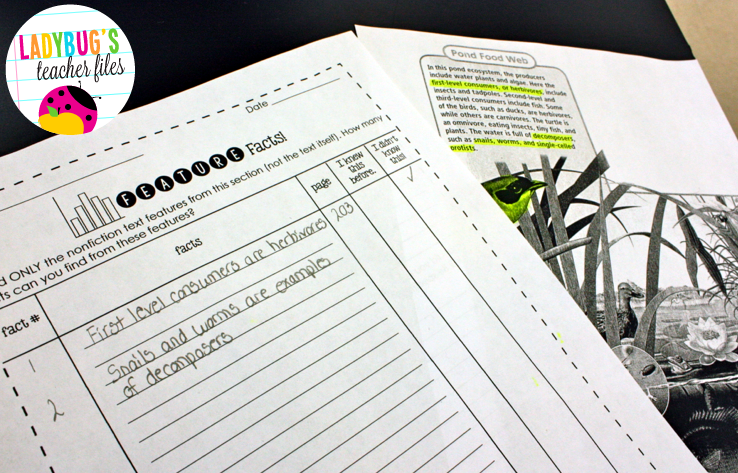
I asked the students to find as many facts from the nonfiction text features as they could and record them in the organizer.
  photo nonfictionfeatures9.png
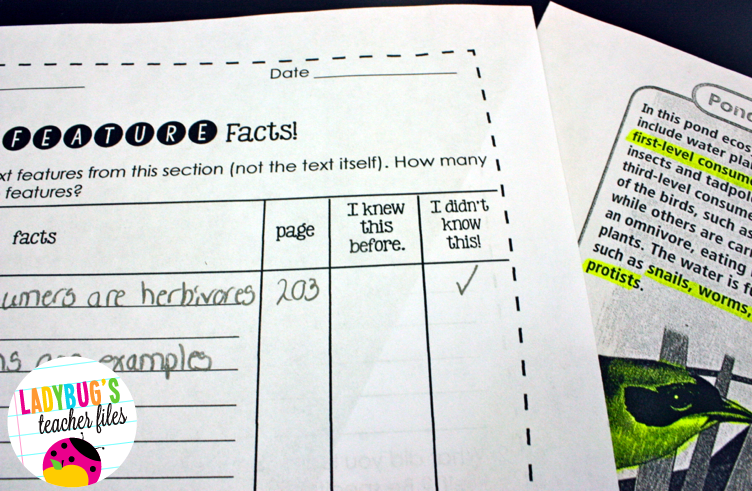
My 5th graders got to work, highlighting and recording all those facts. I watched them study the pictures and captions very closely, sharing out what they discovered with their teammates.

As they recorded facts, students also demonstrated facts they had already known versus new information:
 photo nonfictionfeatures11.png 
(I'm sure you can guess which column had more checks, as was the intent!)

Then we shared out and recorded facts we had discovered on a chart. There were quite a few facts we had learned, and all of this information came before we had even read the chapter! (can you hear me exclaiming this to my class?)

what does this mean to us as readers 
of nonfiction texts?

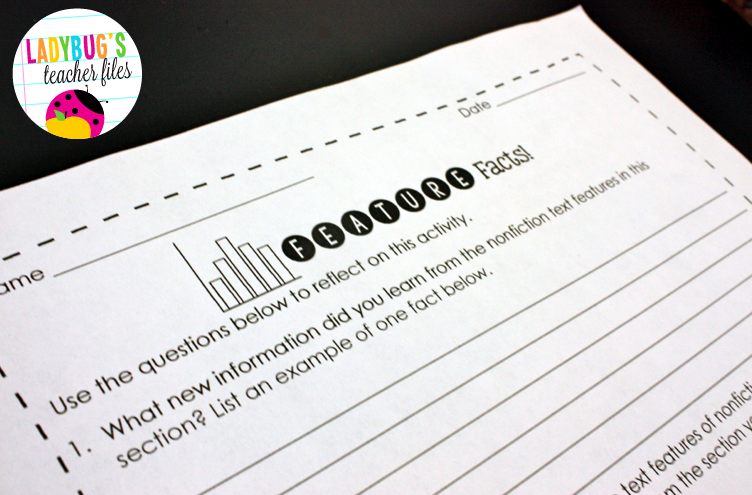
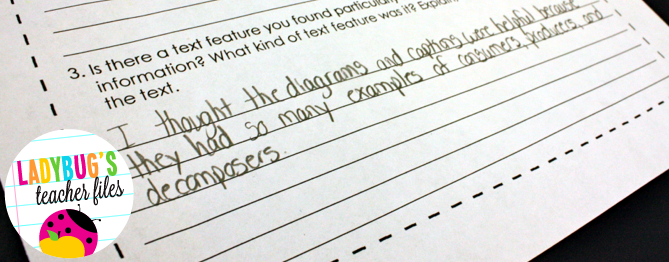
We then took some time to reflect on the experience and what it meant to us as readers.
 photo nonfictionfeatures3.png 
I have learned from my dear friend Jen over at Runde's Room the immense value of reflecting over everything we do in class, so I knew this would be an important closing to our activity. (thank you Jen, I can't tell you enough how you helped me evolve my practice!!!)
 photo nonfictionfeatures6.png 
My students realized how much information could be gained from the text features and were able to share this nicely in their reflections.

And, as an added bonus, it turned out to be a wonderful frontloading activity for Science, as we hadn't even read the chapter yet! 

features in the future

In our reading groups, my students now take the time to look all over the page at the various features, remarking on their findings before reading a particular selection.

And to help continue this practice of utilizing features for information and comprehension, we continue to examine and identify our learning from text features across all subject areas. 

would you like to try this? 

I designed the graphic organizer used with my students to be pretty general, in hopes some of you may be able to use this as well.

If you would like to download this file, please click on the image below:
https://drive.google.com/file/d/0B2ARzMSbNzXNRFJNb2hqNkl4b1E/edit?usp=sharing

facebook friends?

Before I dash off to plan for the week (don't be impressed, I'm bound to get distracted by something more pressing!) I did want to say I've been making a concentrated effort to share happenings in our classroom on Facebook, since I've been such a intermittent blogger this year. I would love to see you there if you would like to follow!! :)


Thanks for visiting, I hope you can use the file!

❤ Editable Valentine Coupons ❤ (file to share)

$
0
0
happy valentine's day!
We are actually not in school today because we are digging out of a big snowstorm. Well, to be totally truthful, I haven't gotten to the "digging out" part yet as I am blissfully working in my comfy pants (also known as pajamas).

So I realize today is the big day, but I do have a Valentine's gift all ready for my class when we head back to school next week and I would love to share a copy with you...just in case you are snowed in as well and needing a little present for your lovelies.

editable for your class
This gift features four editable coupons to create those dearly-loved (and money-saving) presents that will warm your students' hearts. 

Here is the set I am using for my class:
how do I edit them?
These coupons are arranged in a Powerpoint slide. Simply click on each text box and type in the prize of your choice, as well as the expiration date (I find this really helpful to include on my coupons):
simple storage
I am trying something new with this particular set. Instead of cutting out individual coupons that end up floating all over the classroom, I am going to ask my students to keep them as a whole sheet and store them in their number drawers.

As students cash in the homework coupons from this set (those other two prizes are more of my decision) I will just cross them off...or mark them as "void" ;)

click to download
If you would like to download this file, please click on the preview image below (it may not show up in the preview screen, but should work fine once you download the file from Google Docs):
https://drive.google.com/file/d/0B2ARzMSbNzXNUWlndFhXTEhZUk0/edit?usp=sharing
What kinds of money-saving gifts do you like to give your students?

Quick Giveaway on Facebook!

$
0
0
https://www.facebook.com/ladybugsfiles
Hi everyone! I'm having a very quick giveaway for my Facebook friends and I didn't want you to miss it if you haven't visited my page yet.

To enter, head on over to my Facebook page, click on Like, then head to the giveaway page...you can see it right here:
https://www.facebook.com/ladybugsfiles
I won't normally be blogging about these giveaways after this, so be sure to follow the page if you are interested! Thanks for visiting my blog! :)

Print, Solve, & Explain: Equivalent Fractions

$
0
0
One of my main goals this year has been to really get my 5th graders writing about their mathematical thinking. How can they explain a certain math concept? What strategies do they use to solve a problem? How can they show something to be true mathematically?

I knew I wanted my students to write about their thinking in regards to our latest unit on equivalent fractions. I also knew they already had the tools they needed to do so. My students could model equivalence in a variety of ways (folded paper, manipulatives, and drawings). They could also create equivalent fractions by multiplying the numerator and denominator by the same number. Many were comfortable with simplifying fractions through division.

Now I wanted my students to take it to the next level and use their knowledge to explore the equivalence of multiple fractions...and write to explain their thinking.

So I gave them an assortment of fractions, along with five sorting mats:


Working in partners, the students began to classify these fractions into five categories of equivalence. There were 25 fractions cards, but there were not five fractions per group, in order to keep things challenging. :)

Some equivalences were easier to spot quickly:

While others took a great deal of thought and discussion among partners:


I stepped back for this part and watched my students explore and explain to one another. They made calculations, sketched out diagrams, debated over certain fractions, looked to the simplest form for several of the categories (I was over the moon when I heard that last one!). 

It was a beautiful thing to witness!

Once my students were sure of their categories, they glued their equivalent fractions in place. Then it was time to share our findings.

Groups came up to the computer projector to share a group of equivalence they found, as well as their strategies for finding the equivalence:
We kept a list of strategies that could be used to find equivalence and added these strategies to our math notes.

The next day, we came back to the activity...it was time to get it in writing.

I asked my students to choose one category of equivalence (one that challenged them!) and write an explanation.

We used two reflection sheets, a blank one for diagrams and visuals:

And a lined one as well, to write out their explanation of equivalence:

As in all other subjects in class, my students referred to our Transitional Word Posters to help with their explanations:


(I cannot tell you how much my students use these posters for all of their writing pieces, and math is no exception!)

I was delighted to read responses like "Likewise, 20/60 is equivalent to 1/3 just 35/105 is equivalent to 1/3, as shown in the diagram on the next page." 

It worked out so well my class, so I put everything together (with lesson plans, a writing rubric, student writing samples, and more) and listed it in my store. You can learn more about Print, Solve, & Explain: Equivalent Fractions here:
http://www.teacherspayteachers.com/Product/Print-Solve-Explain-Equivalent-Fractions-1117234

You can also see the Transitional Word Posters here (they really are the perfect complement to our mathematical writing projects):
I would love to give a few sets of these right now, if you are interested! If so, please leave a comment with the following information:

1. your email address (so I can send the file along)

The first three readers to comment will win! Thanks so much for stopping by!

Hurry, Hop, and Win!

$
0
0
Hi everyone! My upper-elementary friends and I are joining together for a very exciting blog hop...Hurry, Hop, and Win!

Would you like to join us? You could win a...

And the best part??

You can enter each of our giveaways for a chance to win this prize! That means 19 chances to win a gift card!

And the timing couldn't be any better because this Thursday marks the beginning of a sale at Teachers Pay Teachers! You will find all of my resources at 28% off, from my latest math resource:
http://www.teacherspayteachers.com/Product/Print-Solve-Explain-Equivalent-Fractions-1117234

to all of those morphological resources that have made a huge impact on vocabulary acquisition in my 5th grade class:
http://www.teacherspayteachers.com/Product/Morphology-Dictionary-A-Student-Reference-Book-of-Prefixes-Suffixes-and-Roots-680661

http://www.teacherspayteachers.com/Store/Ladybugs-Teacher-Files

as well as coordinating classroom decor:
http://www.teacherspayteachers.com/Store/Ladybugs-Teacher-Files/Category/Consistent-Colors-Decor
Speaking of resources, I would also love to give a product of choice from my store to the winner of this giveaway! Please see the Rafflecopter below for all the details:

a Rafflecopter giveaway
Next stop in the hop: my friend Ashleigh from Ashleigh's Education Journey! Please click on the button below to hop on for your next chance to win a gift card!
Photobucket
Or visit any of these incredible blogs here to enter all the giveaways!

Want to be sure you got them all? Laura Candler has created a checklist you can print and check right off as you hop: Hurry, Hop, and Win Checklist

Thanks for visiting and best of luck! :)

Giveaway Winner and the Sale Begins!

$
0
0
I can't thank everyone enough for entering our giveaway the other day, as well as the sweet comments you left! I am so very grateful for such lovely readers, thank you!

The winning name has been selected and it is...Marcy W!! Marcy, I am emailing you the prizes right now!

The TpT sale is officially on and this teacher is officially in shopping mode! If you would like to browse my store for any items, please click on the sale graphic below...and don't forget that promo code!

Thank you again everyone! :)

Color-Coding the Classroom

$
0
0
Happy Weekend!! Today I am joining tons of my blog friends in sharing some bright ideas...from our classroom to yours!
The bright idea I would like to share is definitely bright...as in bright colors!

So, I've been decorating my room with black and bright for three years now. I love the happy colors and my students do too (we always laugh when the neon clothes they wear match the bins in the room!).

But in the back of my mind, I was always a bit worried about the amount of color in the room. If you've read my blog since the beginning, you know I used to be pretty one or two-toned when it came to color schemes. 

Was it too much color?
 
Was it distracting to my students?

I want my room to be vibrant and energizing, yet remain calming overall. So this summer I reworked my scheme to be more purposeful in its use of hues:
Suddenly all the colors had a purpose. Now the room looked more cohesive, less scattered.

And I could keep all of my decor, I just had to rearrange it a bit so all colors were together to represent a particular subject.

Each subject in our class has the same basic elements to keep it color-coded and organized. Here's a peek at our color-coding for Writer's Workshop:
1. Bins: Students pass in any assignments during the day in these bright buckets.

2. Charts: I use large pieces of bright chart paper that I've laminated to create our anchor charts (I am NOT the best chart-maker...working on that one!). We create the large ones together on these laminated sheets, then I type them up onto smaller sheets to refer to later.

3. Markers: We use coordinating chalk markers to mark the following on each bulletin board:
  • essential question
  • key vocabulary
  • our strategies
I'm honestly not sure if I will use these markers in the same way next year or not. They are pricey, but they do pop nicely across the room. It's been a great visual for my students this year.

4. Notebooks: This was such a lucky find this summer!! Walmart happened to have all the colors I needed to coordinate my notebooks to each subject area! The best part? I didn't have to make any labels for any of our notebooks...it's so clear which notebook is needed for which subject just by glancing at it!
It's amazing what this color-coding has done for our classroom! I've been able to keep all of our color, yet make the room much calmer and more cohesive.

And the best part?

It has been so much easier for my newest English Language Learners to find the resources and materials they need for each lesson...and that has been wonderful to see.

I know my room evolves a bit each year, but I also know that I will stick with color-coding by subject in the future.

The next stop in the hop is Tech with Jen! Jen has a post all about Keyboarding Skills for your students and you can click on the button below to read all about it. I will see you there because that's where I'm headed first!
You can also hop around any of our blogs here:


Make a Digital Plan (with Planbook.com)

$
0
0
Hello dear friends! 

I have to tell you, every time I look at my blog I get this horrible-pit-of-sadness-feeling over my lack of blogging this year. 

I miss it terribly. I miss YOU all even more!

But you know how it goes I'm sure, more than anyone else does. New standards to implement, lesson planning around the clock, falling asleep in an armchair before 9:00 PM.

I know I'm not alone in this!

Anyhow...about that planning part I mentioned.

One thing has made my teaching life so much easier this year:
Oh, how I planbook.com!

There are so many thing you can do with this site, starting with one of my favorite past-times...color-coding:
(as you can see, ahem, I've yet to fill out my plans for next week. But I am blogging!!!)

Each class you create has an option to choose a color:

I set mine to correlate with my students'color-coded subjects and I gray out the non-academic times like lunch and recess:

Classes can be set up to run once a week (which is ideal for our specials) or daily:

Now for the fun part (ok, the color-coding is a fun part too but THIS is my true favorite).

There are drop down menus to copy and paste lesson formats!

For instance, I have worked really hard this year to include an essential question in each lesson I teach. I also have all of my classes set up in a workshop format. Planbook.com makes it really easy to copy and paste this format. All you have to do is click on the little arrow on the right side of the lesson box:

Choose copy from the menu:

Then go to the next lesson and select paste to place the same formatting in this next area:

You can also select "extend" to continue a lesson into the next day:

This will make a copy of your exact plan which you can place in the next day's box, so you can continue on!

I type up all of my plans on planbook.com on my laptop and access them with the app on my iPad at school. THIS is really cool because I can view my plans without lugging my computer in my bag:

It's just perfect!

I'm not blogging about this on behalf of planbook.com, just out of love of the site on my own. For $12.00 a year, it is a dream of a bargain considering how much easier it has made my planning life!

I hope this was of help if you did not know about this site yet!

How do you like to set up your lesson plans?

Don't Answer Questions

$
0
0
Sounds kind of unteacherly, doesn't it?

But I promise it isn't!

Before I tell you though, I must share the exciting news...it's a new month of Bright Ideas!
And, just like last time, I'm linking up with tons of my blogging friends to bring you another month filled with teaching ideas. In a crazy-hectic year, this linky has truly become one of my favorite things to look forward to!

So. Back to the questions.

There are a lot of questions that come up during the school day, aren't there? And I love that my students are always thinking critically and know they can ask these kinds of questions during all lessons.
But I had been wondering lately...was I really answering them in the best way possible?

Sure it's great my 5th graders are asking thought-provoking questions...but in the fast-paced frenzied feeling of the school day, I felt like I wasn't taking the time to do these questions justice. I felt like I was just giving an answer back automatically.

Then, one day during a math lesson, it hit me:

Don't answer all of their questions.

So a student raised her hand and asked a thoughtful question.

I opened my mouth, stopped, closed my mouth, and hesitated.

Then I said, 

"That's a great question...I'm going to turn that back to the class."

"What do you think?"

There was a brief moment of quiet, maybe of a bit of surprise at being asked to reflect on a classmate's question. But then they got talking...and solving!

It didn't take extra time I had feared losing. It was actually quick and engaging for my students. I realized then I had a new strategy to utilize in all subjects.

Turning student questions back to the class has helped them in so many ways. This type of discussion has allowed my students to:
    Students are asked to think critically about answers and solutions to these questions. What background knowledge do they have? What known strategies can they apply to answer this?

        This type of questioning and answering lends itself so naturally to a Turn and Talk format (which my 5th graders are VERY fond of!). An engaged class makes a happy, learning class and THAT makes for a very happy teacher!

            Student-led questioning and answering also brings a sense of belonging to an academic, collaborative community. Students know their questions are valued. They are a guiding force in the learning. I have noticed an increase in the amount of high-level, thoughtful questions asked since we have begun this format.
              I realize this is probably something many others do and I do not wish to act like I've invented something new...but what I have learned from this experience has impacted my teaching in all subjects.

              I've learned to listen even harder, take more time, and let my students guide their way in learning when the questions call for it.

              It truly has been one of the best experiences this school year...one I know I will carry with me into the future.
              So...are you ready to read some incredible bright ideas? I have been waiting all week for this!! Just click on any of the wonderful blogs just below:

              Meaningful Map Facts

              $
              0
              0
              Hello! I wanted to share a little activity that has helped in a big way in our class this year. This activity complements one I shared back in February, Utilizing Those Nonfiction Text Features.

              During our unit on explorers, our class encountered numerous helpful maps. The only problem? With so much information on the textbook pages, I wasn't sure my students were really analyzing the maps carefully.

              So we devoted one whole lesson to strictly analyzing a map.

              Doesn't that always feel nerve-wracking? Like you should be covering more in a lesson? But I've learned that these really focused lessons are the ones with the biggest payoff in the end.

              taking a look
              At first glance, it looked at though it showed a bunch of famous explorers and their routes (I'm thinking like a 5th grader here...you can tell, right??):

              then a closer look..
              But upon closer analysis, we noticed so much more. We began with a turn and talk. The partners identified tons of additional information to what we had already known so far. Explorers who had chosen similar paths. Others who claimed lands. Treaties that had to be drawn up. Unique routes to Asia. The list went on and on.

              taking note
              We then turned to a simple template to record a bulleted list of facts we could pull from the map. Meaningful facts...ones that tied into our prior knowledge of these explorers.

              Soon the pencils were flying, filling the page up with all the things they had learned from this one map.

              After sharing our findings as a whole class, we were amazed to see all we had learned from this map. 

              And it gets even better!

               unexpected benefits
              We had accomplished what I had hoped for in this lesson...my students had analyzed the maps collaboratively and independently. They made and noted key observations, extending their understanding of this topic.

              However, I didn't realize at the time how much the information would stick!

              Weeks later, as we were working on our informational texts (all about explorers!) I conferenced with student after student who recalled details for their research from this map. "Remember how Magellan found that waterway in South America to get to the Pacific Ocean? It was on that map we looked at," they told me.

              I couldn't have been any happier!

              These connections and understandings are the kind I'm always striving to achieve with all of my students, especially my newcomer English Language Learners. Knowing that the information had stayed with my students proved how meaningful the lesson was.

              I do have some more to share about using maps in Social Studies, but I will save that for next time. In the meantime...

              would you like to try it out?
              If you would like to grab a copy of the fact template, please click on the preview image below:
              https://drive.google.com/file/d/0B2ARzMSbNzXNTG1ZcW1SbmZUTzg/edit?usp=sharing
              I hope it is as helpful in your classroom as it has been in ours! Thanks for visiting! :)
              Viewing all 179 articles
              Browse latest View live


              Latest Images